Connect your AI
This one has no menu item. If your website does not have it, your assistant cannot connect, and it says so.
AI editing comes with our higher plans. Contact us to upgrade, or visit your customer portal for a self-service upgrade to a supported plan.
AI editing lets you change your website by talking. You type what you want in plain words. Your assistant makes the change for you.
This is not a chat box on your website. Visitors never see it. It is you, talking to your own assistant, in the app you already use.
There is nothing to install on your website. It is already listening.
What you can ask for
Section titled “What you can ask for”Say what you want in your own words. These all work:
- “Update our Tuesday hours to 8 to 4.”
- “Add a testimonial from the email I am pasting below.”
- “Make the headline on the home page shorter.”
- “Add a service called Gutter Cleaning, with a short summary.”
- “What does our Contact page say right now?”
Your assistant can do most of what you can do in the admin panel. It can read and write pages, add and remove entries, and handle your photos, your menus and your settings.
Your website’s AI address
Section titled “Your website’s AI address”Your assistant needs one address. It is the same one every time:
https://yoursite.com/_emdash/api/mcp
Put your own web address in place of yoursite.com. Every setup below uses it.
That address is part of your website. It only opens for people you have let in.
MCP is the shared standard that AI apps use to talk to other tools. That is the only jargon on this page, and you never have to learn more about it.
Nothing goes live by itself
Section titled “Nothing goes live by itself”Know this part before you start.
Your assistant edits a page that is already live. The change is saved as a draft. Your website keeps showing the old version until someone publishes the new one.
You have two ways to do that:
- Ask your assistant to publish it.
- Open the page in your admin panel, read it, and press Publish yourself.
A brand new entry starts as a draft too. Saving and publishing covers what each button does.
Before you start: menus move
Section titled “Before you start: menus move”The AI apps below change their menus and names often. A screen may look a little different by the time you read this. The shape of the steps stays the same every time: turn on the feature if the app needs that, add your AI address, then sign in and approve. If a menu is not where we say, look for words like plugins, connectors, or apps.
The approval screen is the one part that always looks the same, because it belongs to your website, not to the AI app:
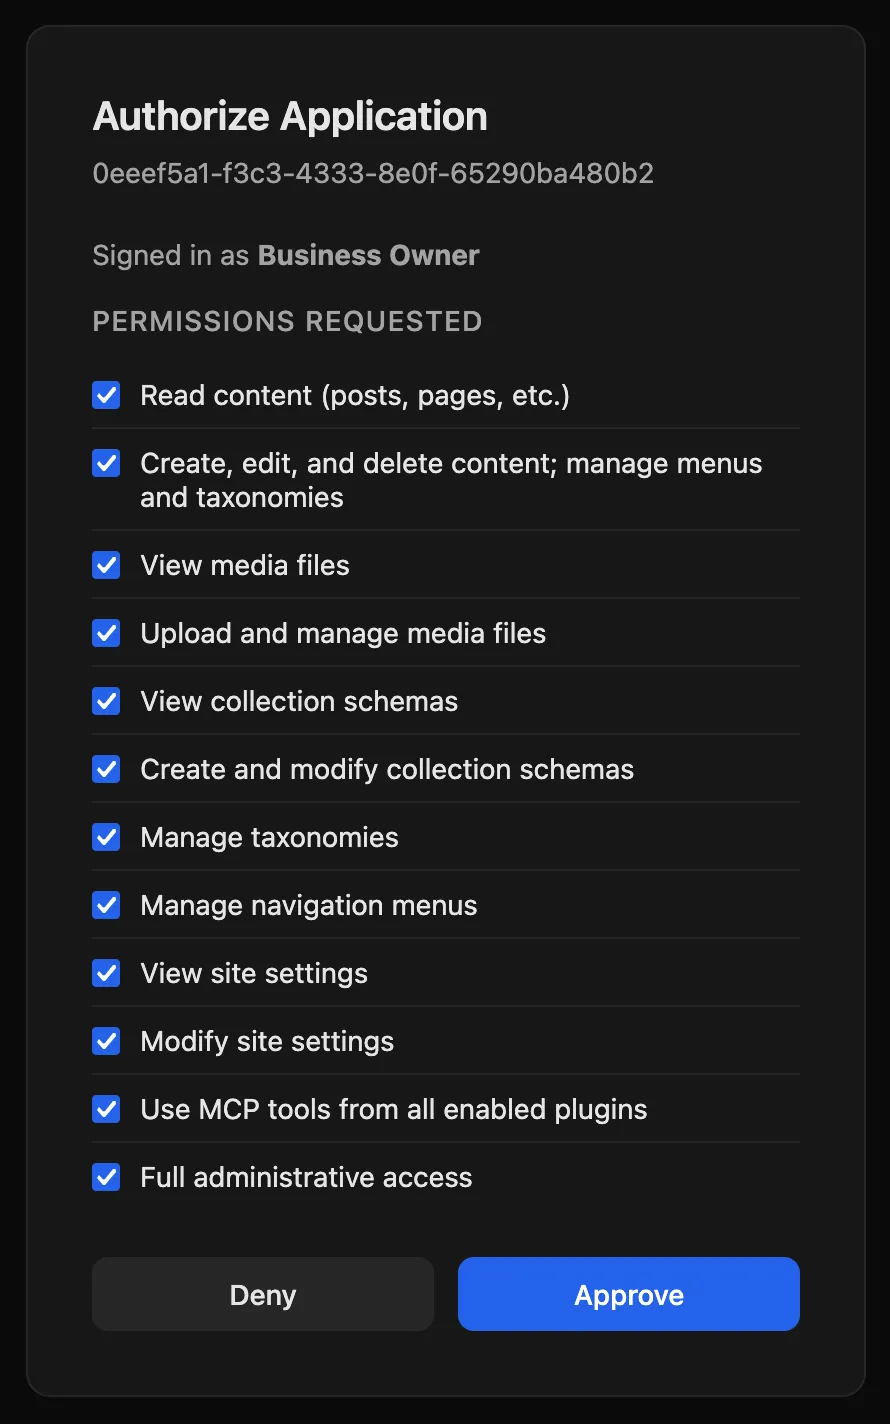
Every checked box is a power you are handing over. You can uncheck the ones you do not want before you press Approve. For day to day writing work, uncheck the boxes about site settings, collection schemas, and full administrative access. Your assistant can still read and edit pages, and the connection is safer.
Claude
Section titled “Claude”These steps are for claude.ai in a browser.
- Open Settings, then Connectors.
- Click Add in the top right, then Add custom connector.
- Give it a name and paste your AI address.
- Leave the other choices alone. Claude checks your website and picks the right ones by itself. The word Detected shows beside its picks.
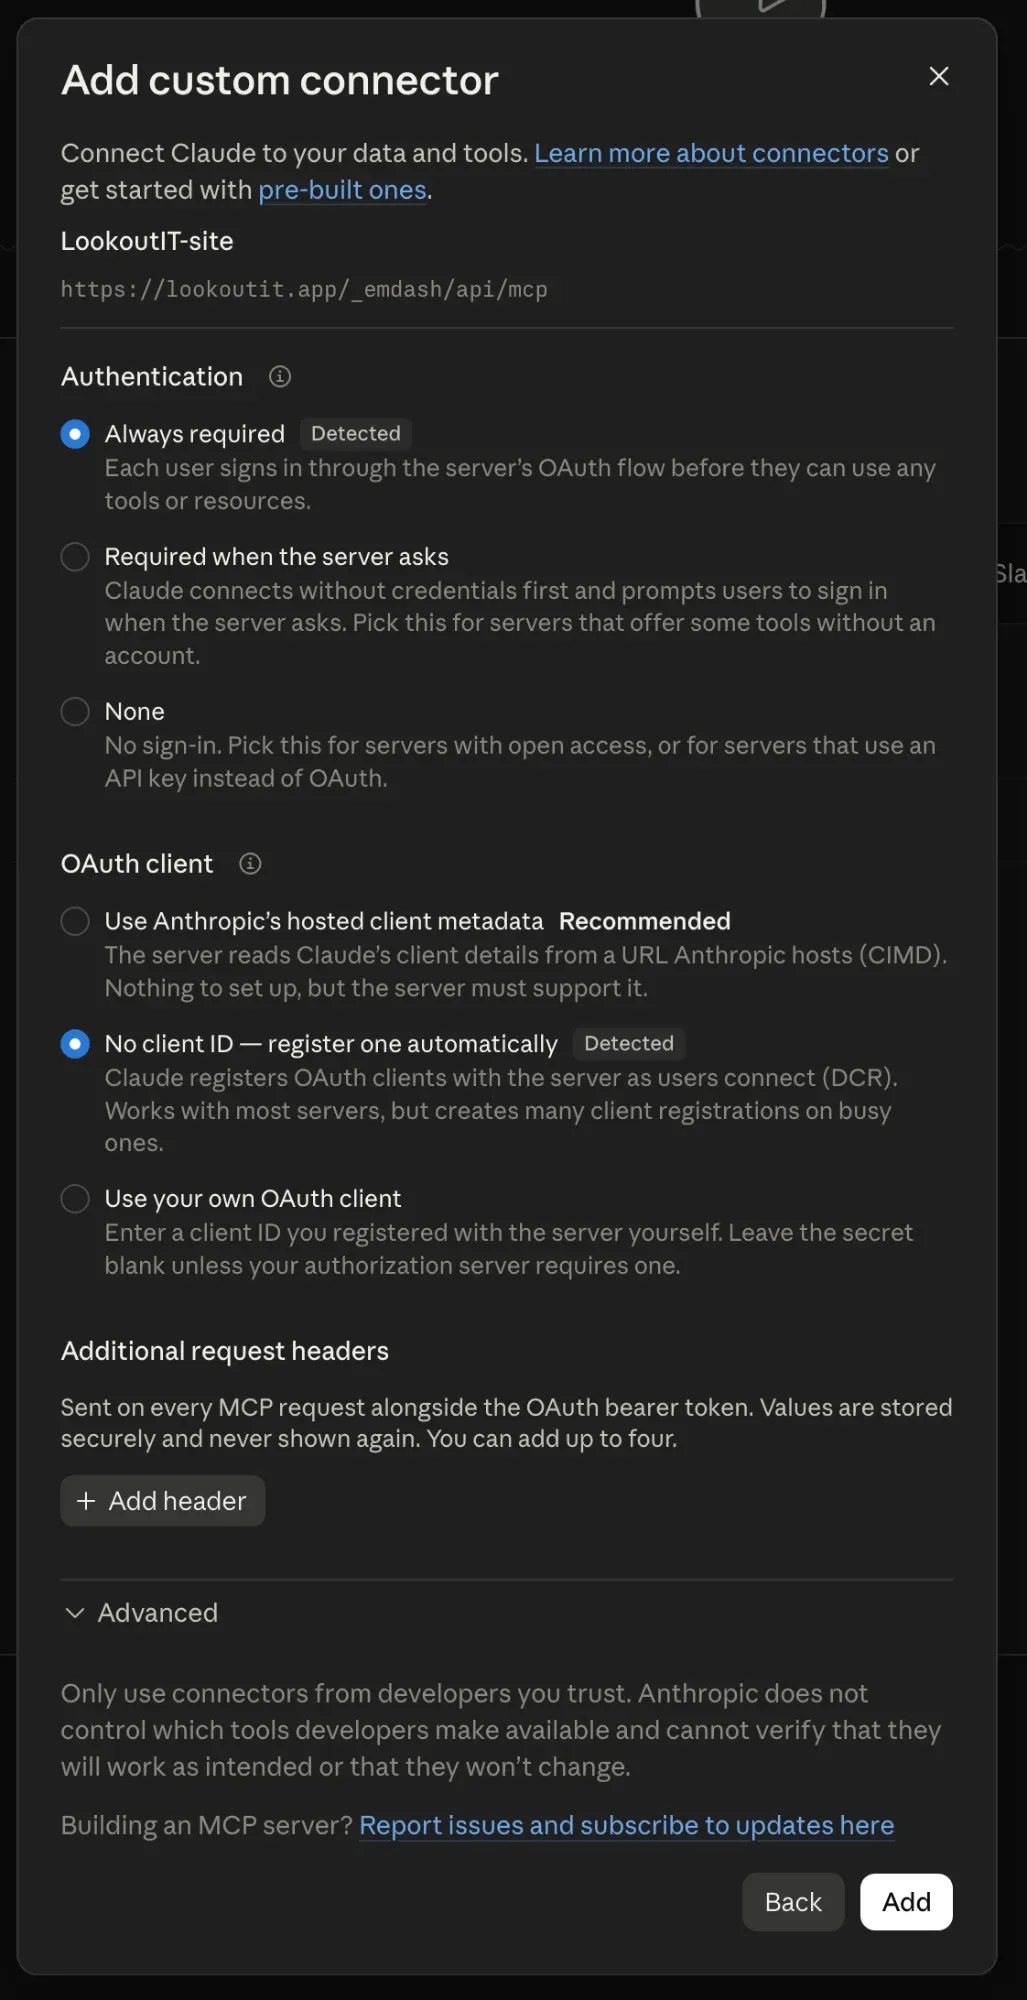
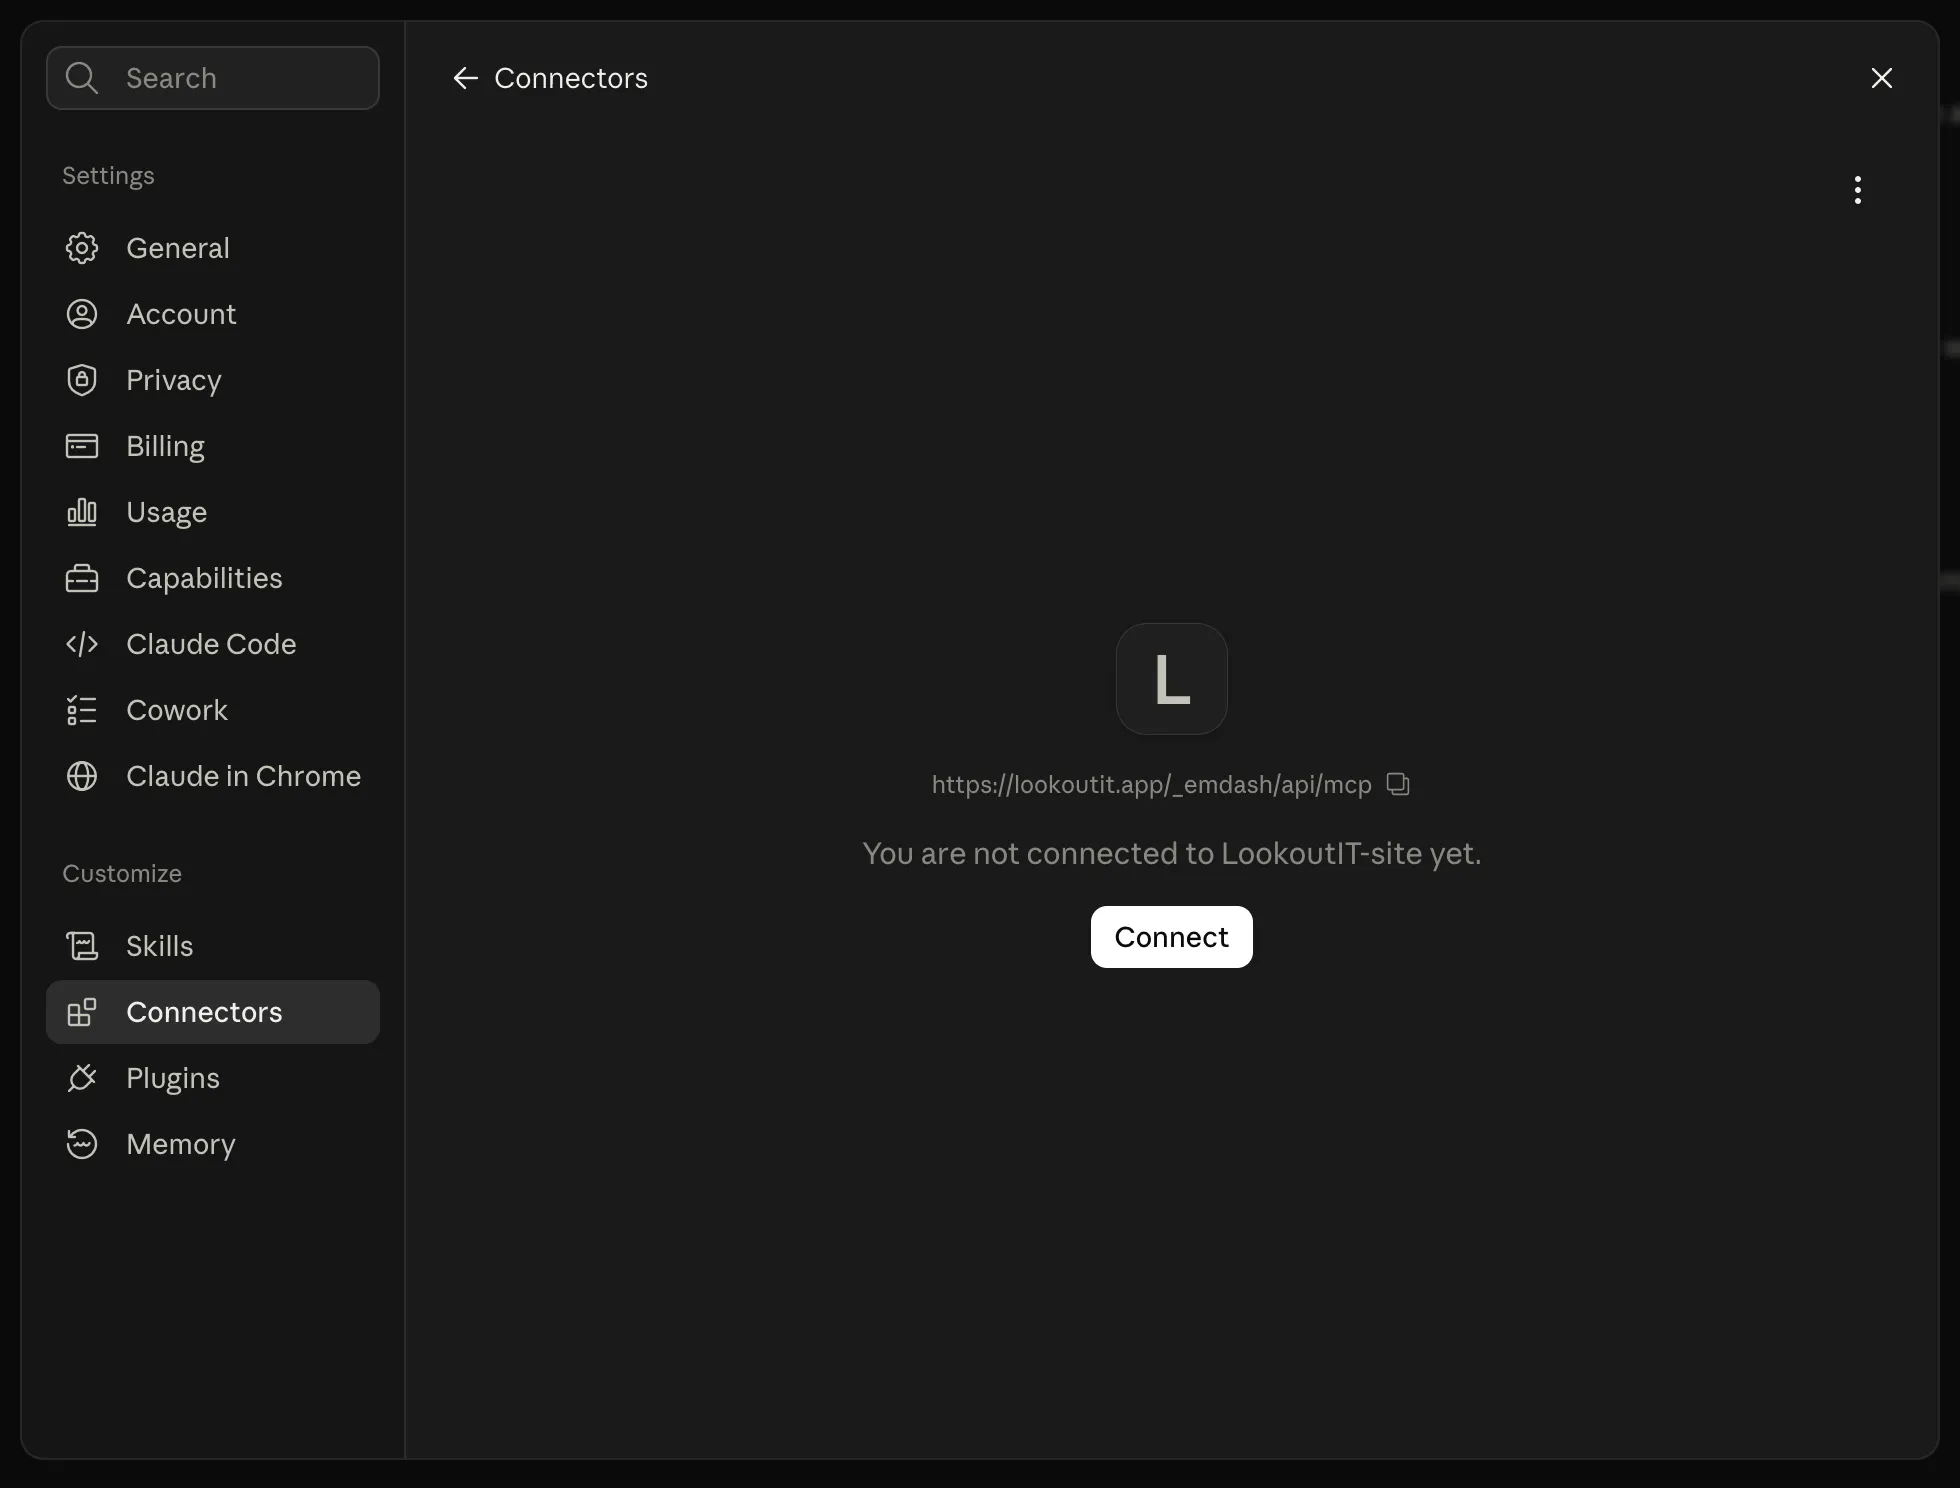
- Click Add. Claude opens a page for your new connector.
- Click Connect. Sign in to your website with your passkey, the same one you use for your admin panel, and approve the request.
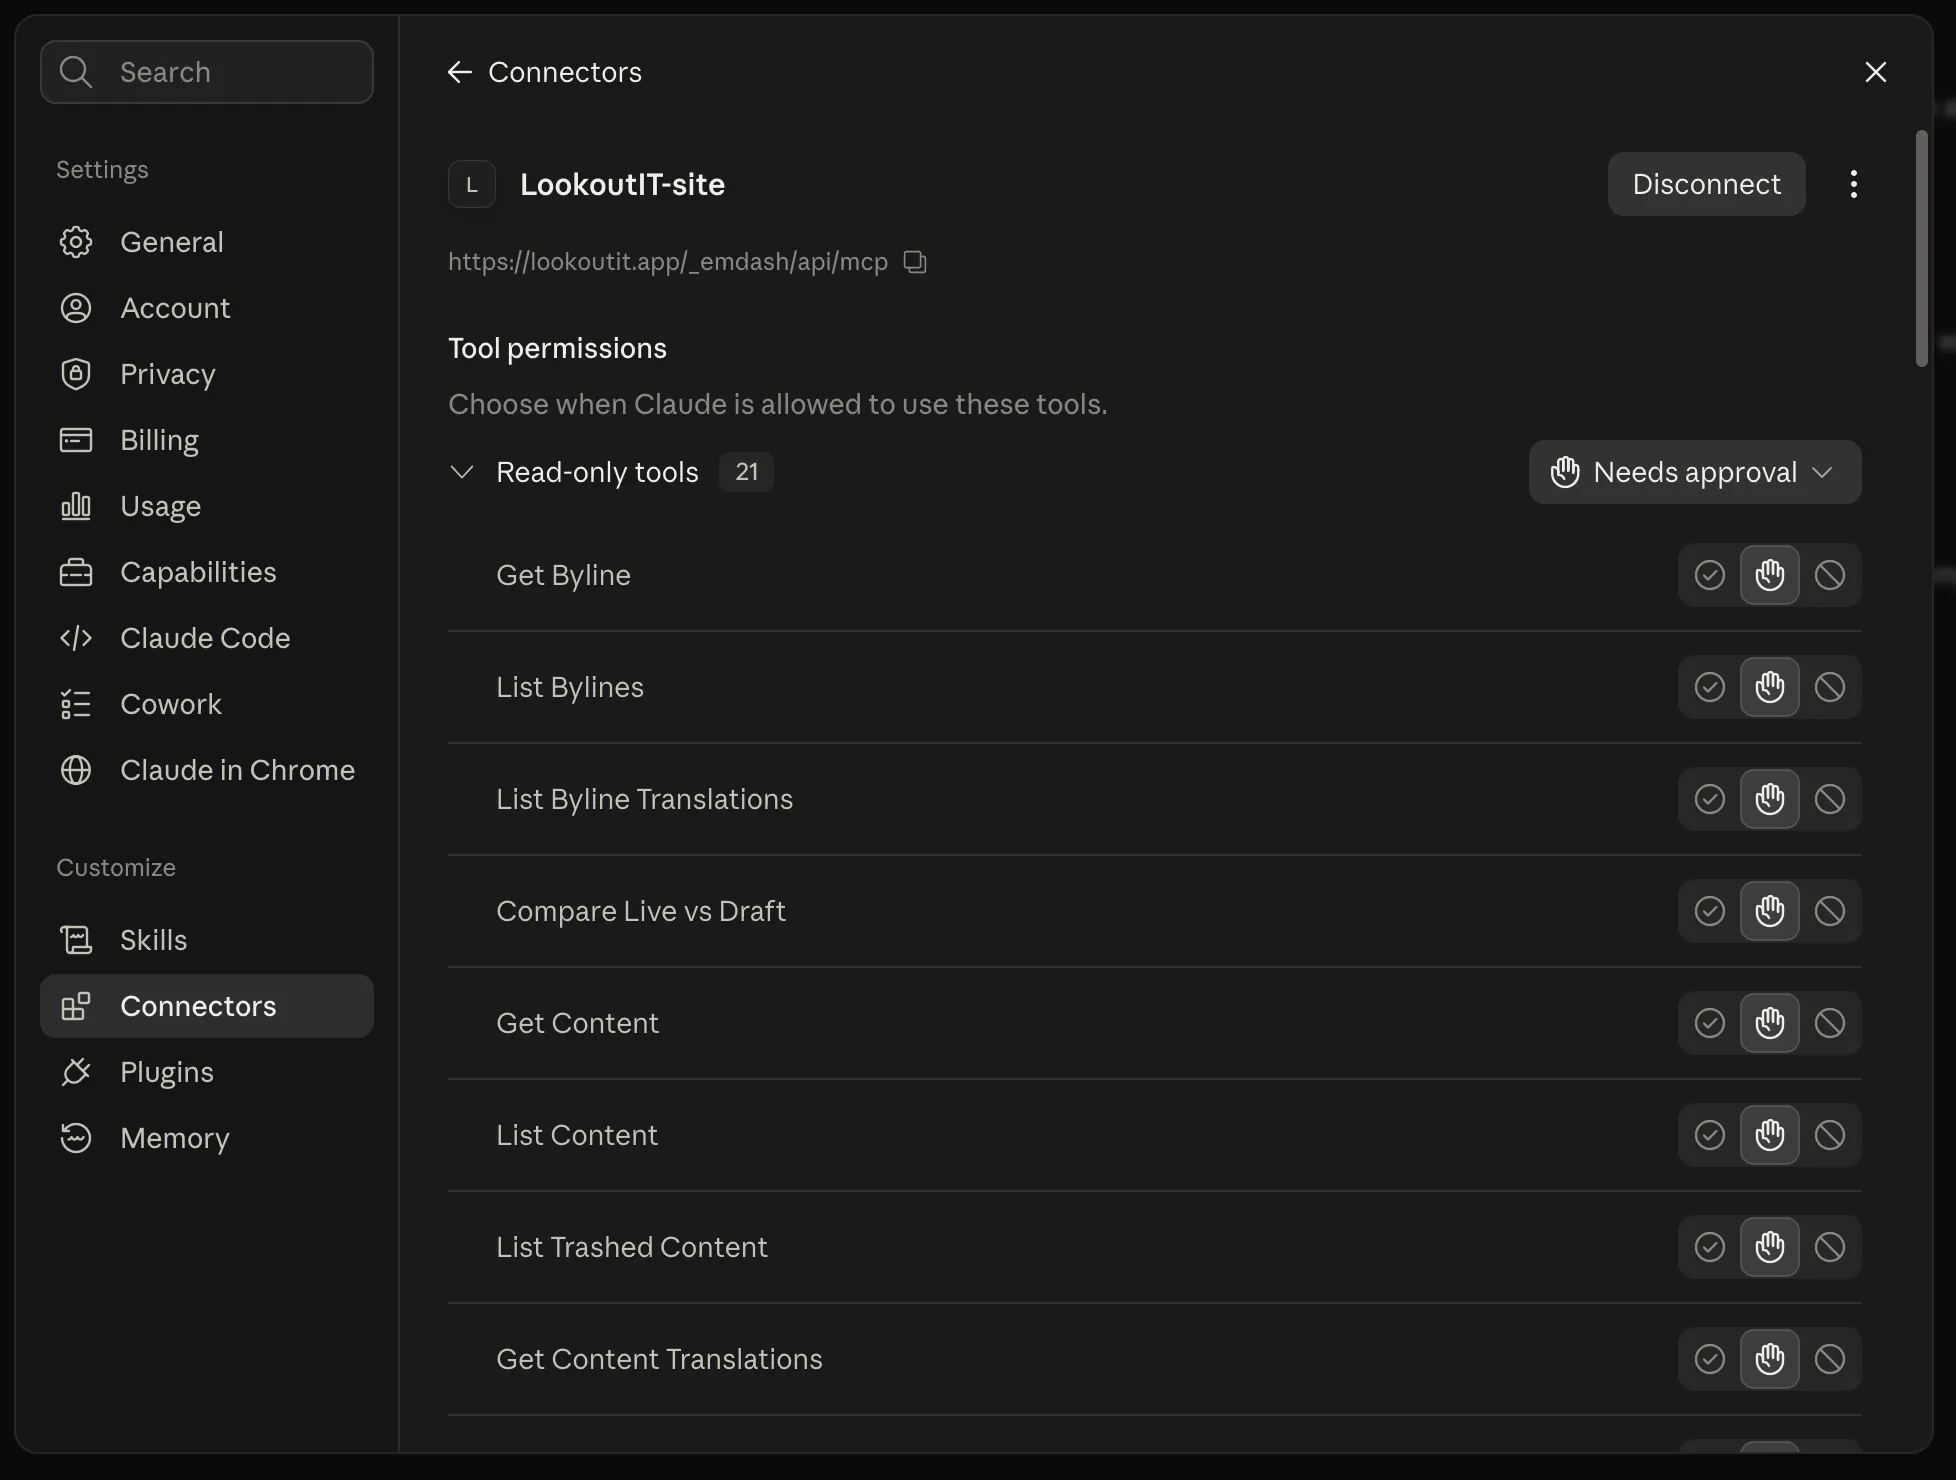
When it works, the same page lists every tool your website offers, with a choice beside each one. Out of the box, Claude asks you before using them.
Signing in covers passkeys, if yours is not set up on this computer yet.
Claude Code
Section titled “Claude Code”Claude Code runs in a terminal window. If that is not something you use, skip this part.
Paste this line, with your own web address in it:
claude mcp add --transport http my-site https://yoursite.com/_emdash/api/mcpA sign in window opens. Sign in and approve it, the same as above.
ChatGPT
Section titled “ChatGPT”ChatGPT needs a paid plan for this: Plus, Pro, Business or Enterprise. Use the website, not the phone app.
First, turn on developer mode. That is the switch that lets ChatGPT add tools from outside its own store.
- Open Settings, then Security and login.
- Scroll down to Developer mode and turn it on.
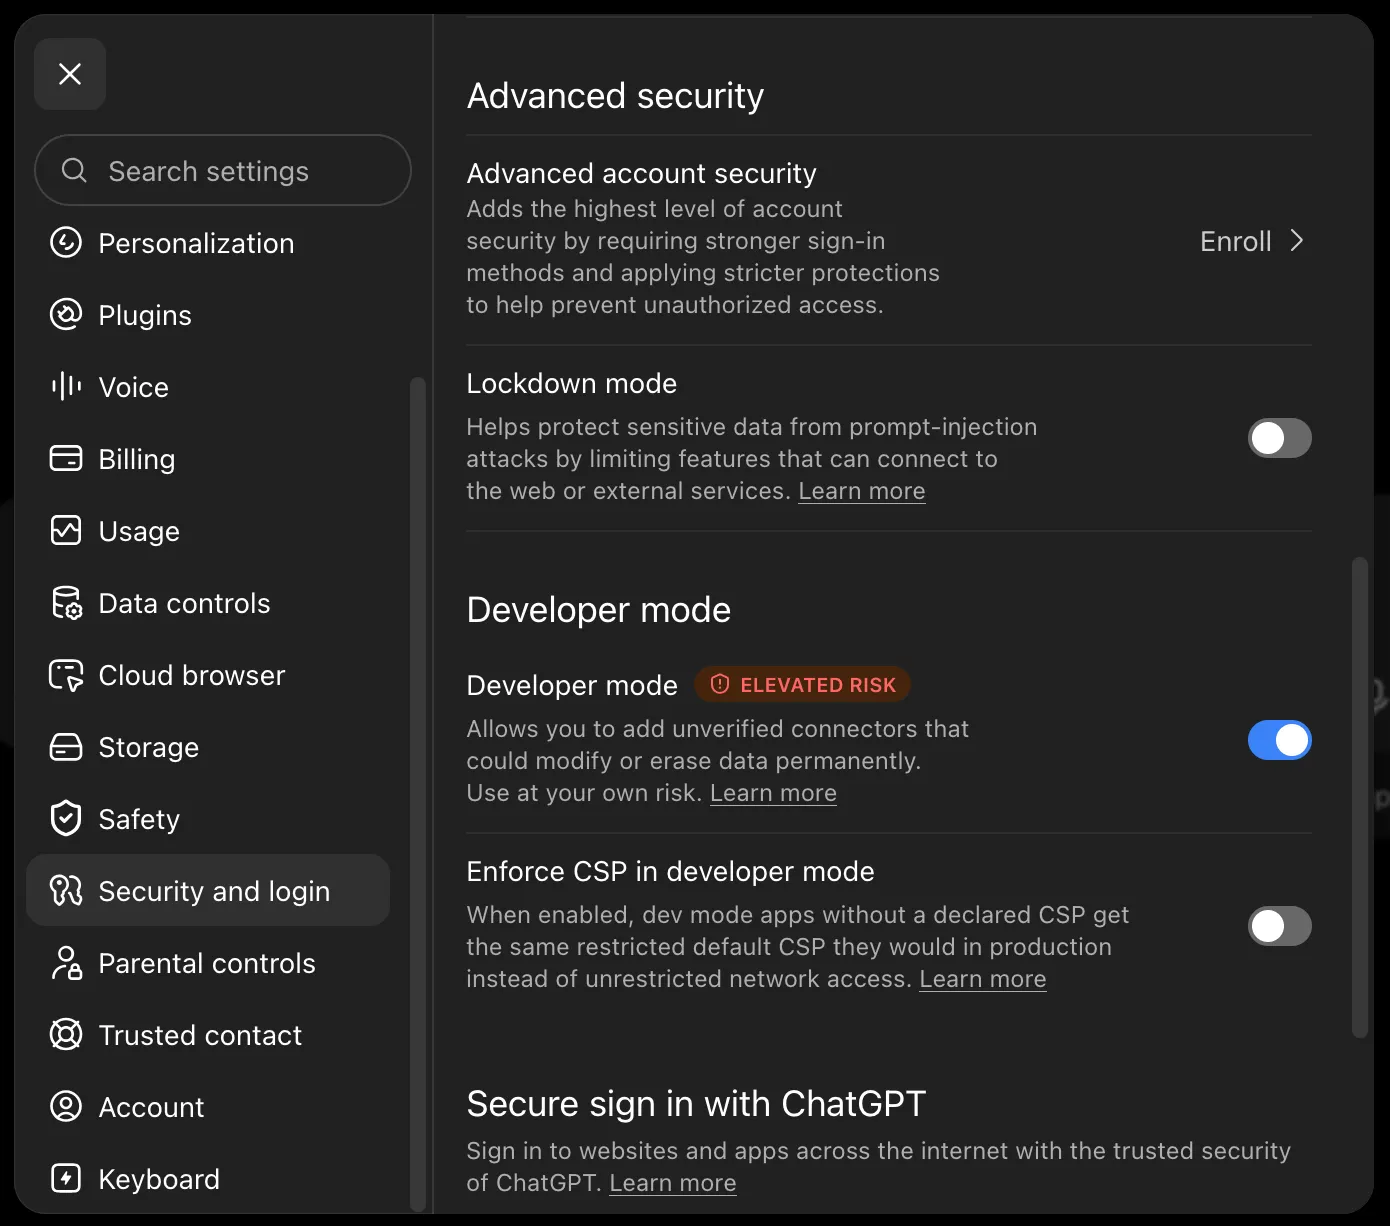
ChatGPT calls it elevated risk because that switch can add any outside tool. Your own website’s address is the only one you are adding.
Then add your website:
- Open Settings, then Plugins, then Browse plugins.
- Press the + button in the top right corner.
- Paste your AI address and give it a name.
- Sign in with your passkey and approve.
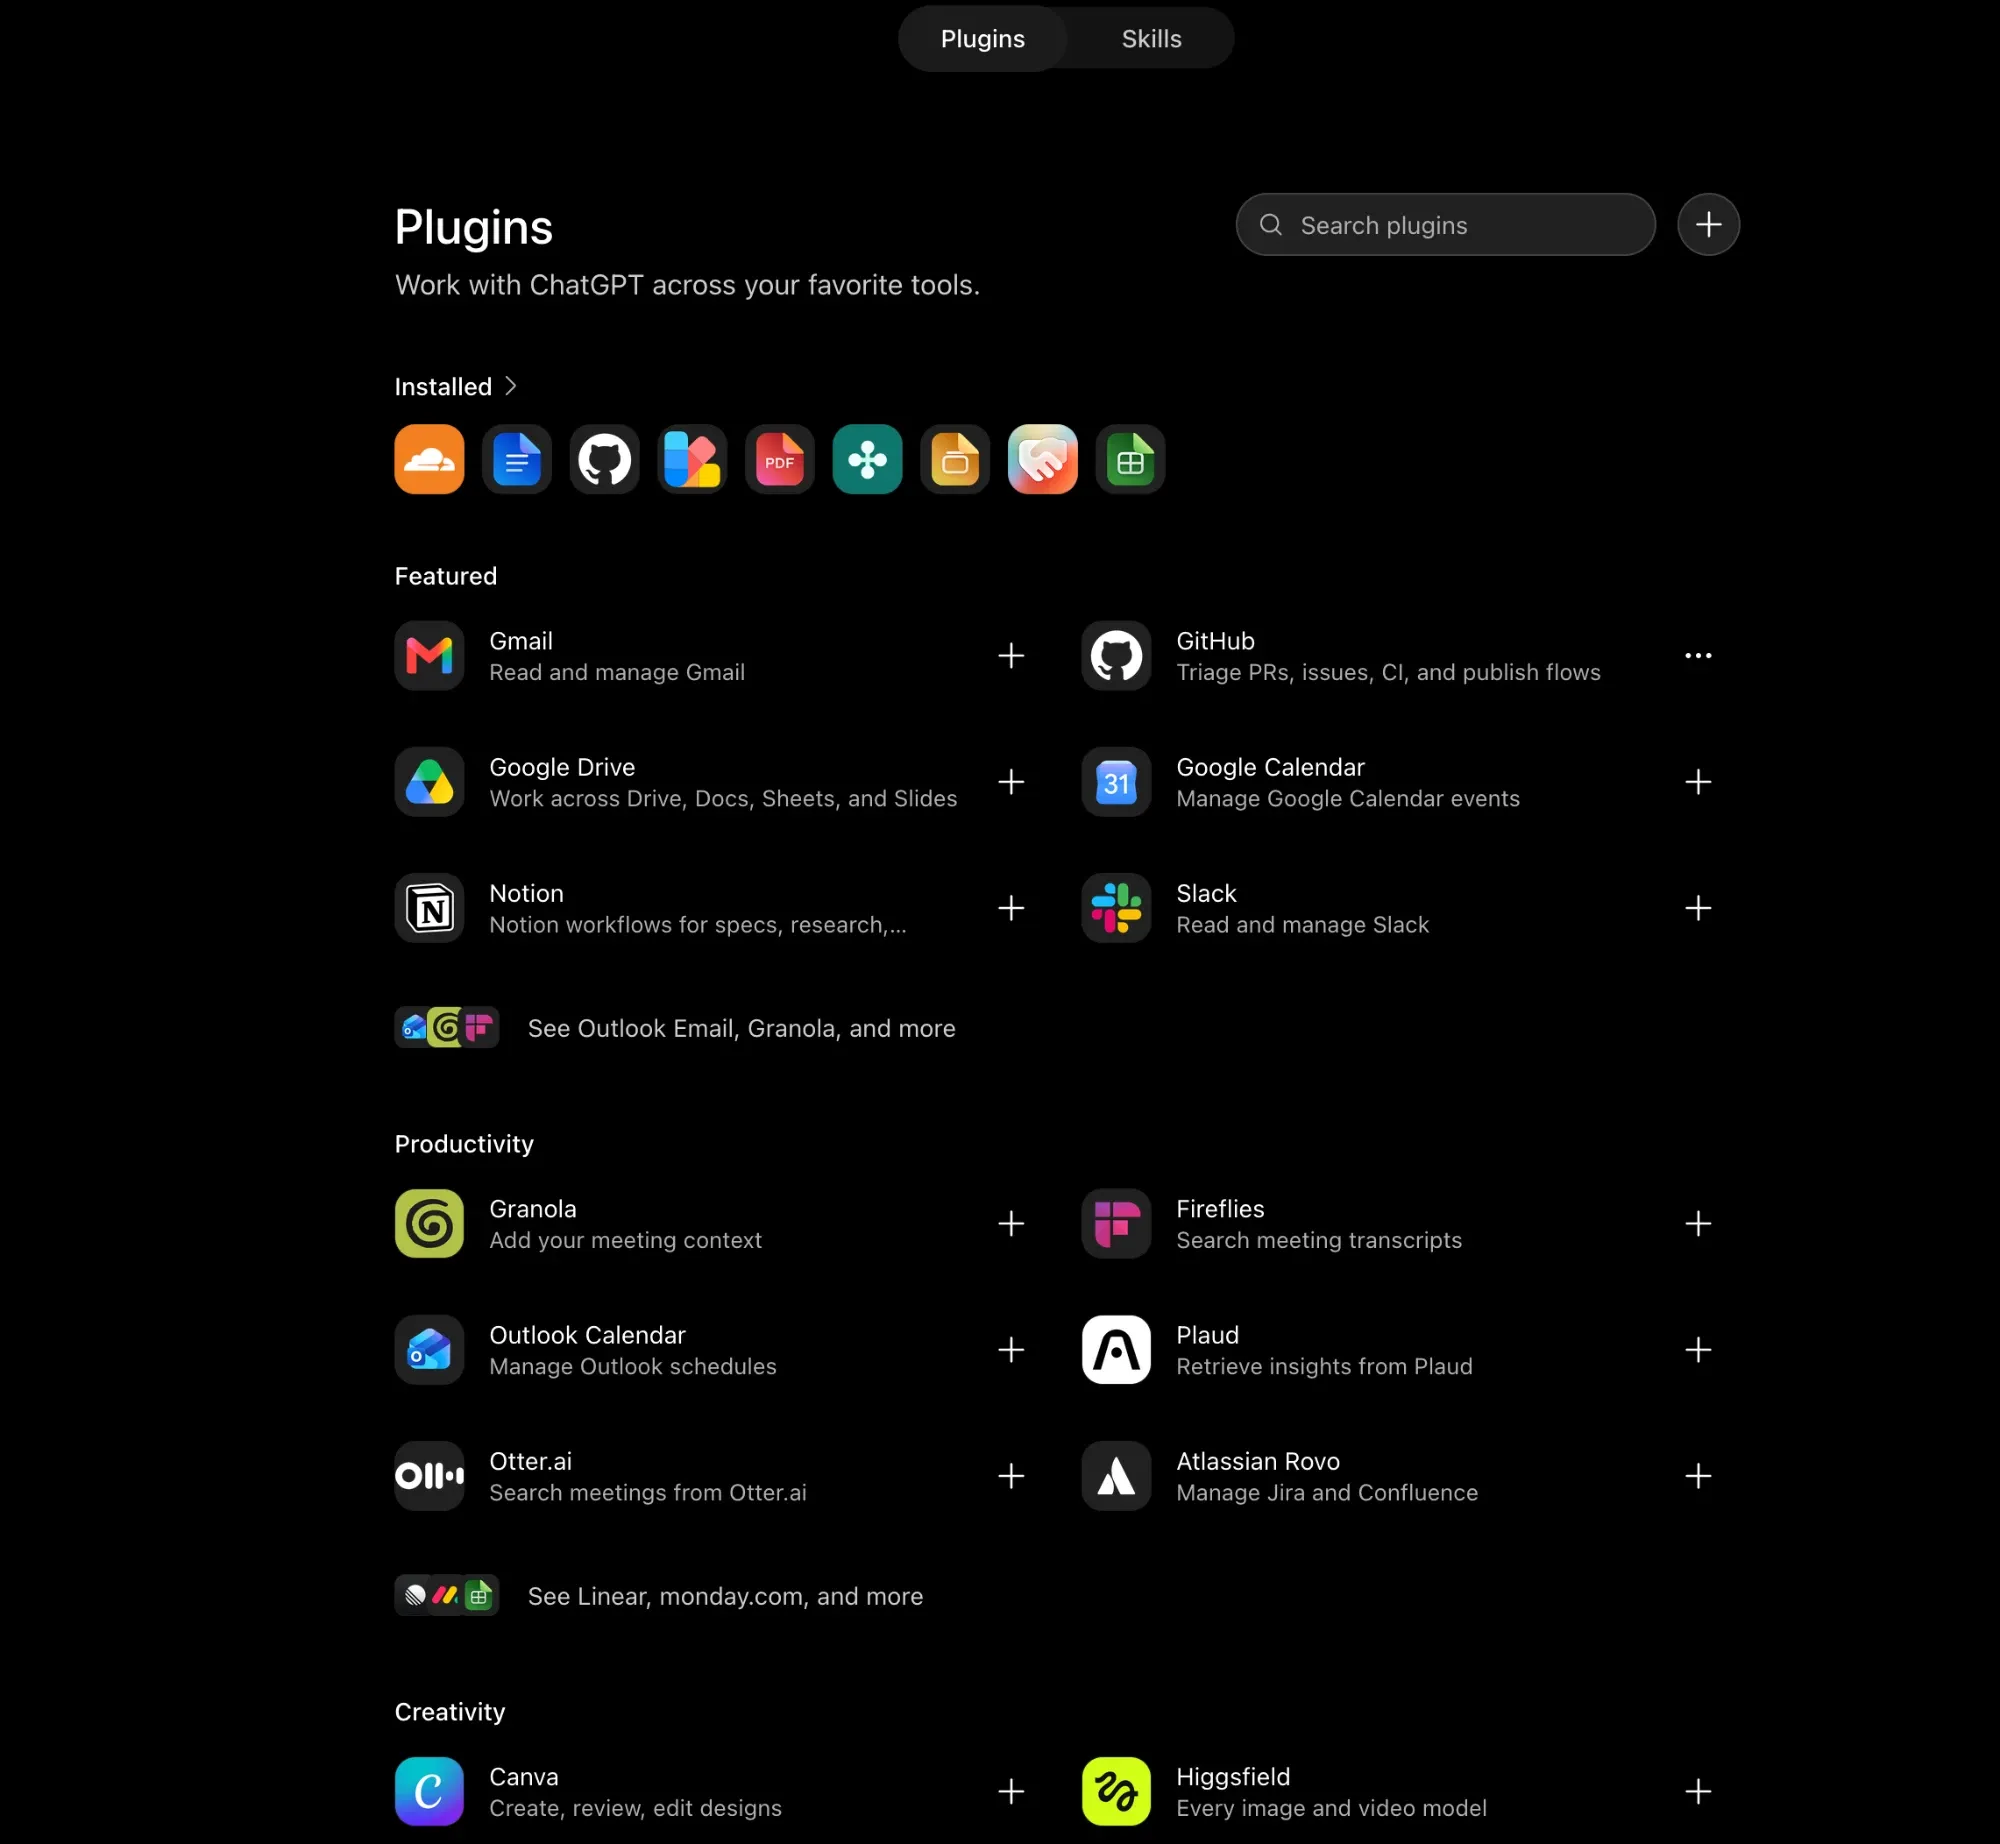
When it works, the plugin’s own page shows your website’s address, says Authorization supported: OAuth, and shows the date under Connected on.
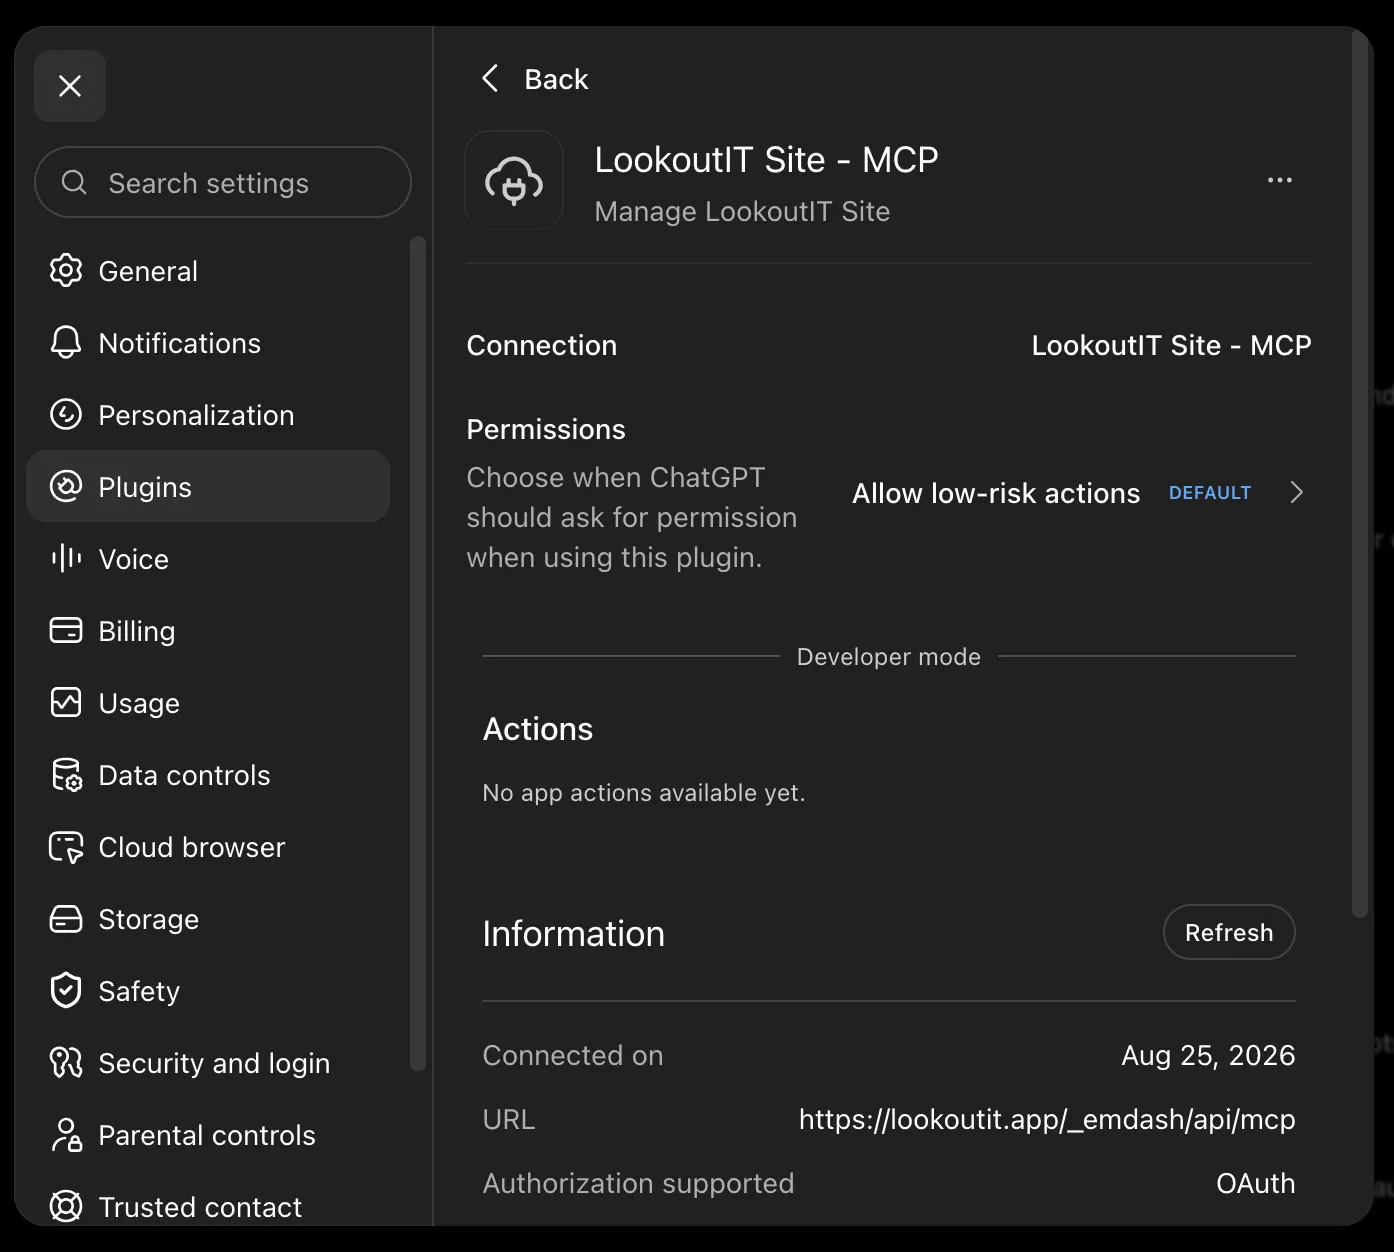
One line on that page says no app actions are available yet. That is normal. It is talking about a different kind of add-on. Your tools show up in the chat, not on that page.
Gemini
Section titled “Gemini”Gemini can do this, but not from the plain chat box.
The Gemini CLI takes your AI address as a server entry. If your company uses Gemini Enterprise, an admin there can add it for everyone.
Gemini uses only the tools part of what your website offers. That is the part that does the work, so editing still works.
A model you run yourself
Section titled “A model you run yourself”Some people run their own AI on their own computer, with Ollama or something like it.
The model itself cannot connect to anything. It has no way to reach out. The chat app in front of it is what connects. Open WebUI and goose are two that can.
Point that app at your AI address. It also needs a token, which is next.
Tokens, for apps that cannot sign in
Section titled “Tokens, for apps that cannot sign in”Some apps cannot open a sign in window. They need a token instead.
A token is a long password that lets a program talk to your website without a person signing in. Make one in your admin panel.
- Go to Admin, then Settings, then API Tokens.
- Make a new token.
- Pick the smallest set of powers that does the job. Content only is enough for most work.
- Copy the token and put it somewhere safe.
Your website shows the token once and never again. Lose it and you make a new one.
In the other app, the token goes in a header field. It is written as
Authorization: Bearer then a space, then your token.
You can cancel a token on the same screen at any time. It stops working the moment you do.
Settings covers the rest of that screen.
Now talk to it
Section titled “Now talk to it”There is nothing more to set up. Open a new chat and ask, the same way you would ask a person. You never pick a tool yourself. Your assistant reads your request and picks for itself.
The first time it touches your website, the app may stop and ask you to allow it. That is the permission setting you saw during setup. Read what it wants to do, then allow it.
If your assistant answers from memory instead of looking at your website, tell it to use your website. Naming the connector works: “Check our LookoutIT site and tell me what the contact page says.” In Claude, you can also check that the connector is turned on under the sliders icon in the message box. In ChatGPT, check that the plugin is turned on for that chat.
Start with a question, not an edit. “What does our contact page say right now” proves the connection with nothing at risk.
Here is a real edit, start to finish. The owner asks in plain words. The assistant makes the change, holds it as a draft, and asks before publishing:
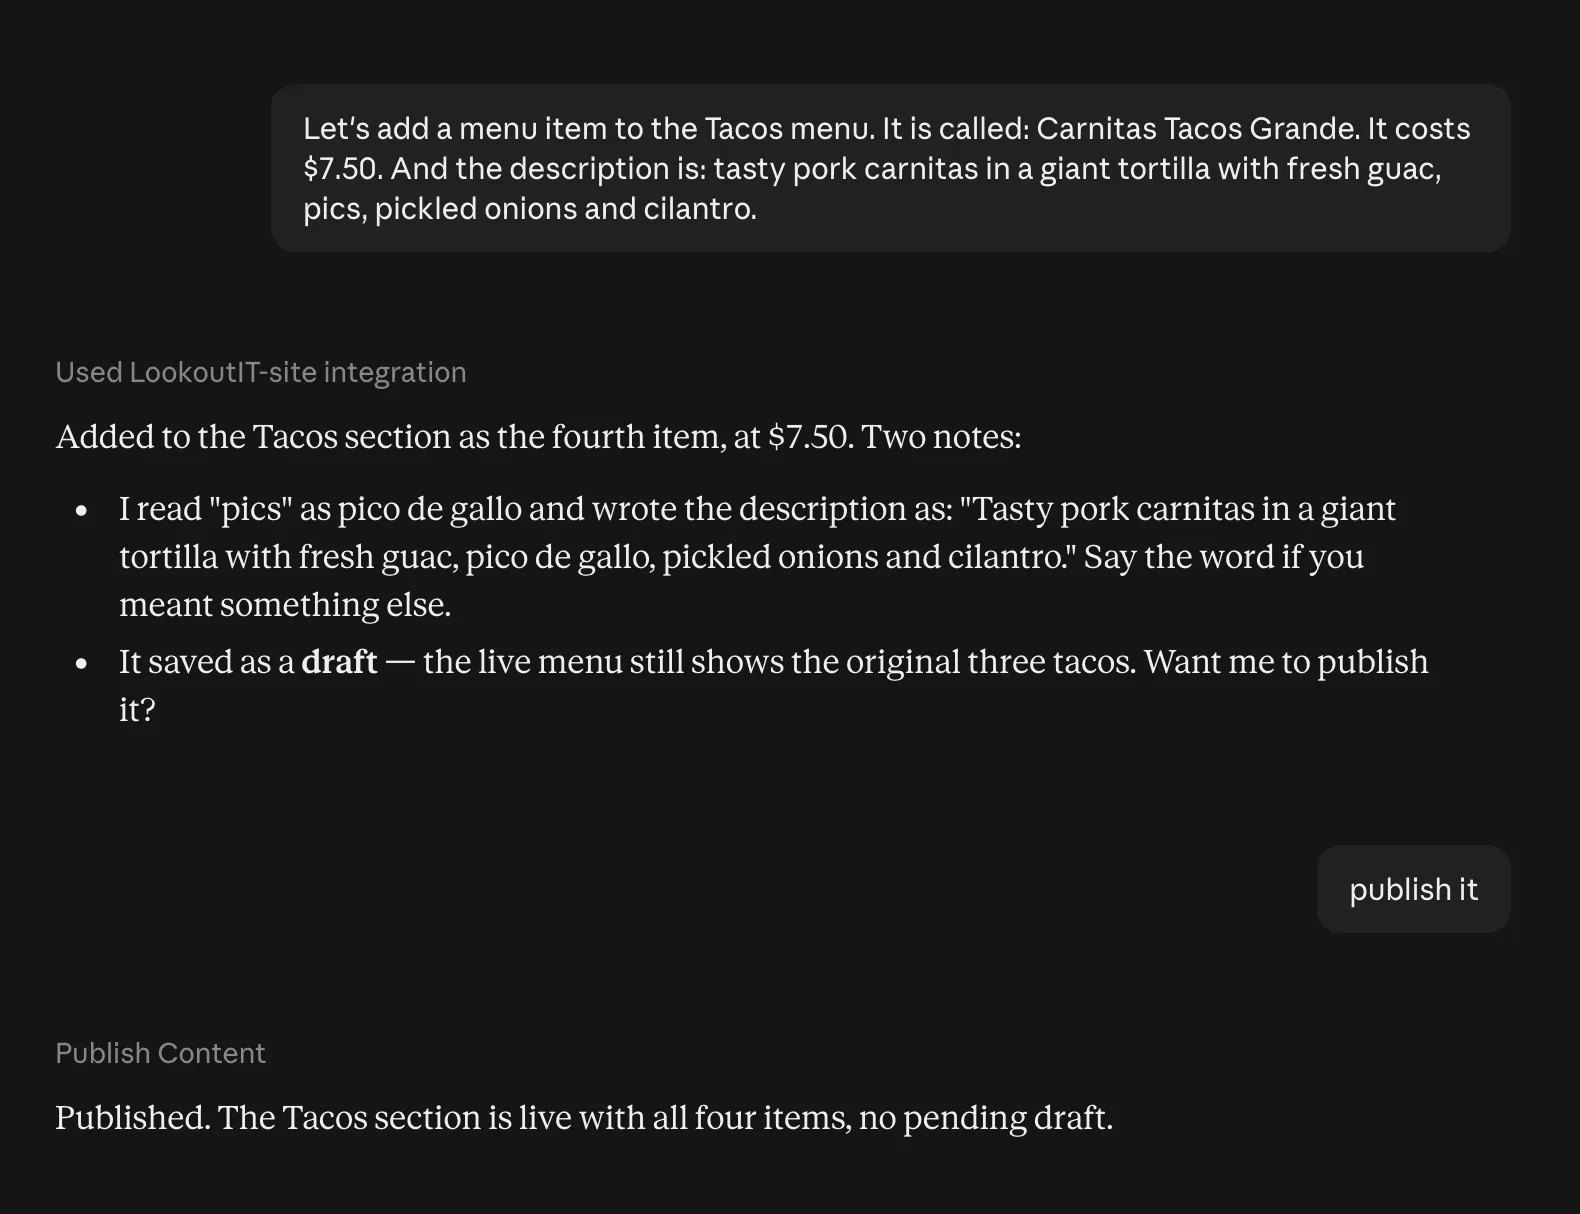
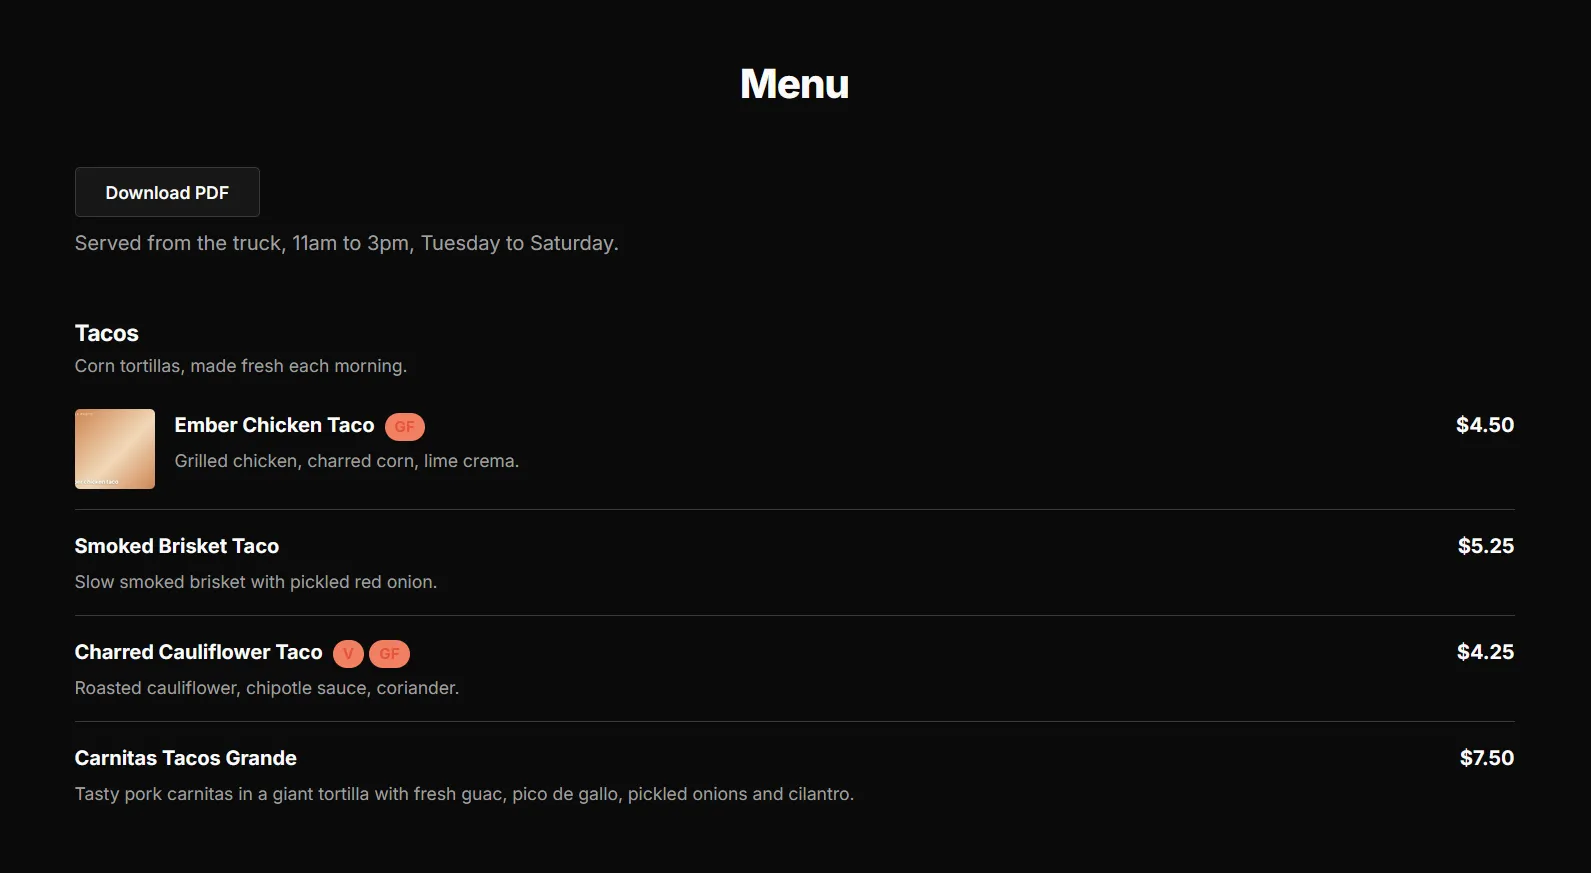
Notice it caught a typo, read pics as pico de gallo, and said so instead of guessing quietly. The owner said publish it, and the live menu picked up the change right away:
Good habits
Section titled “Good habits”Sign in yourself for day to day work. When you sign in, your assistant gets the same powers you have. That covers your settings and the shape of your site. That is fine while you are sitting there watching it.
Use a limited token for anything left running. A tool that runs on its own, day and night, has no reason to change your settings. Give it content only.
Read before you publish. Ask for the change, then open the page and read it. Publish when you are happy. A minute here saves you a bad afternoon.
Start small. Ask a question before you ask for an edit. Ask for one change before you ask for ten.
Look at the live page afterward. Your website is what your customers see, not the chat.
Checked against EmDash 0.34.0 and Lookout Ridge IT template 0.11.8 on August 21, 2026.