

Content
Gallery
Photo albums shown on your site.
Gallery is where your photos of finished work live. Photos are grouped into albums: one album per job, or per year, or per type of work. That is up to you.
One row here is one album.
Go to Content, then Website, then Gallery.
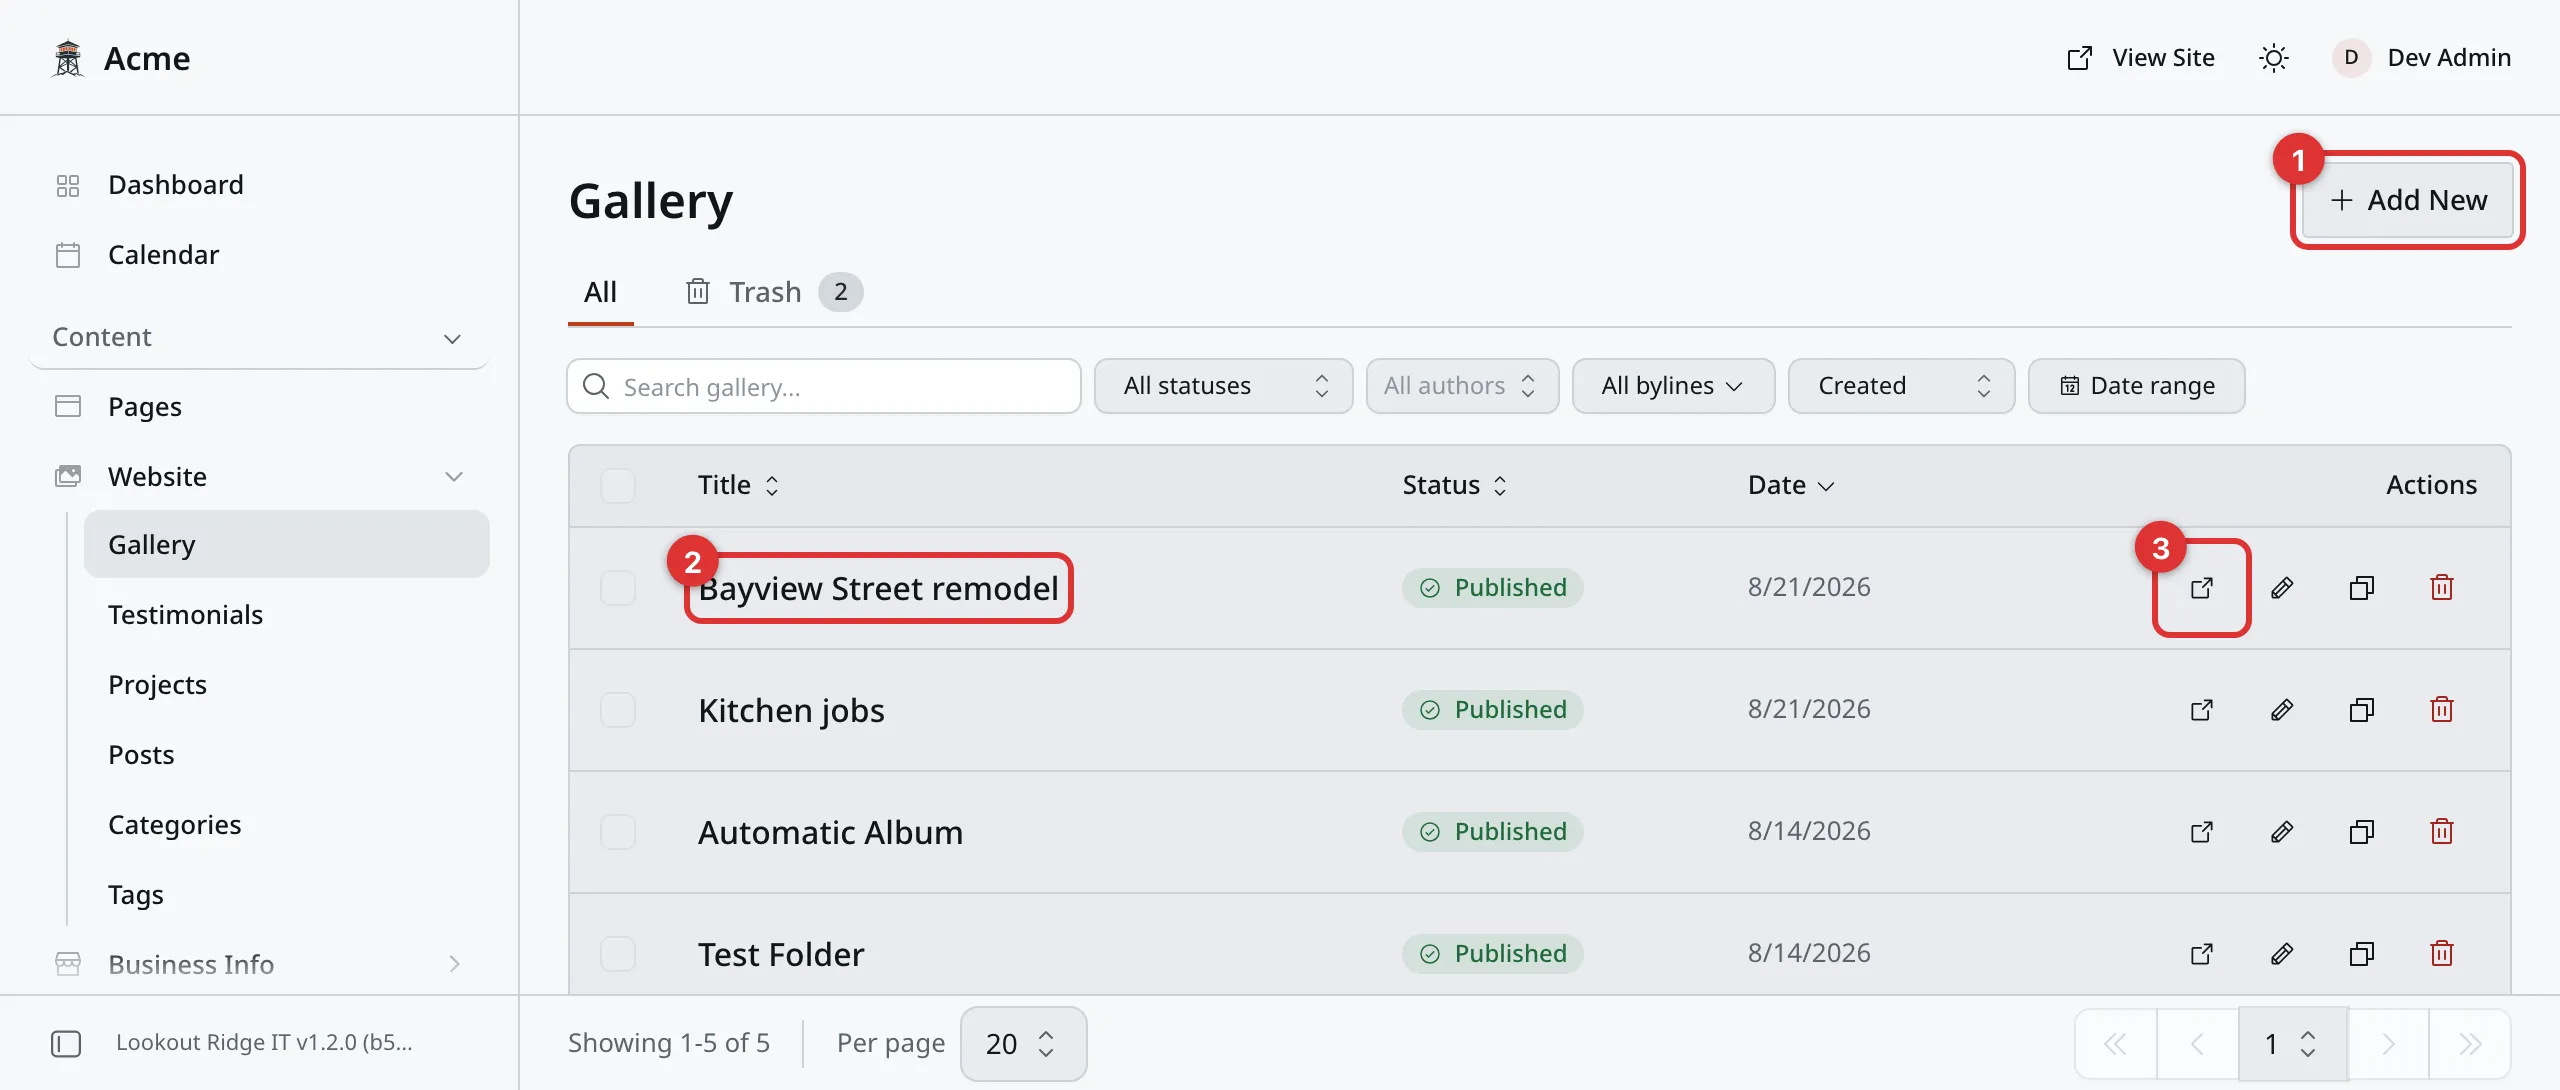
Each row is one album, and each album holds its own set of photos.
1. Add New. Makes an empty album with no folder behind it, so every photo has to be added by hand. Start a new album from a folder instead, as shown below.
2. The album title. Click it to open the album and work on the photos.
3. The view icon. Jumps to that album on your live website.
Making an album
A new album starts as a folder. Each folder you make under Media Folders gets an album here with the same name. The album is live right away, but empty.
Important
Only an Admin can make a folder. If you do not see Media Folders under Plugins, then Content Tools, ask the Admin on your team to make it for you.
- Go to Plugins, then Content Tools, then Media Folders.
- Type a Folder name. This is the album title on your site, so name it for a customer: “Kitchen fitted in Fairhaven”, not “batch 3”.
- Click Create media folder.
- Go to Content, then Website, then Gallery. Your new album is in the list.
- Click its title to open it.
- Write an Intro if you want one. It is a line or two under the title. Leave it empty and the site shows the title on its own.
Media Folders can also fill the album for you. Or add the photos by hand, like this. Upload them first, so they are ready to pick. Media shows you how.
Now add the photos.
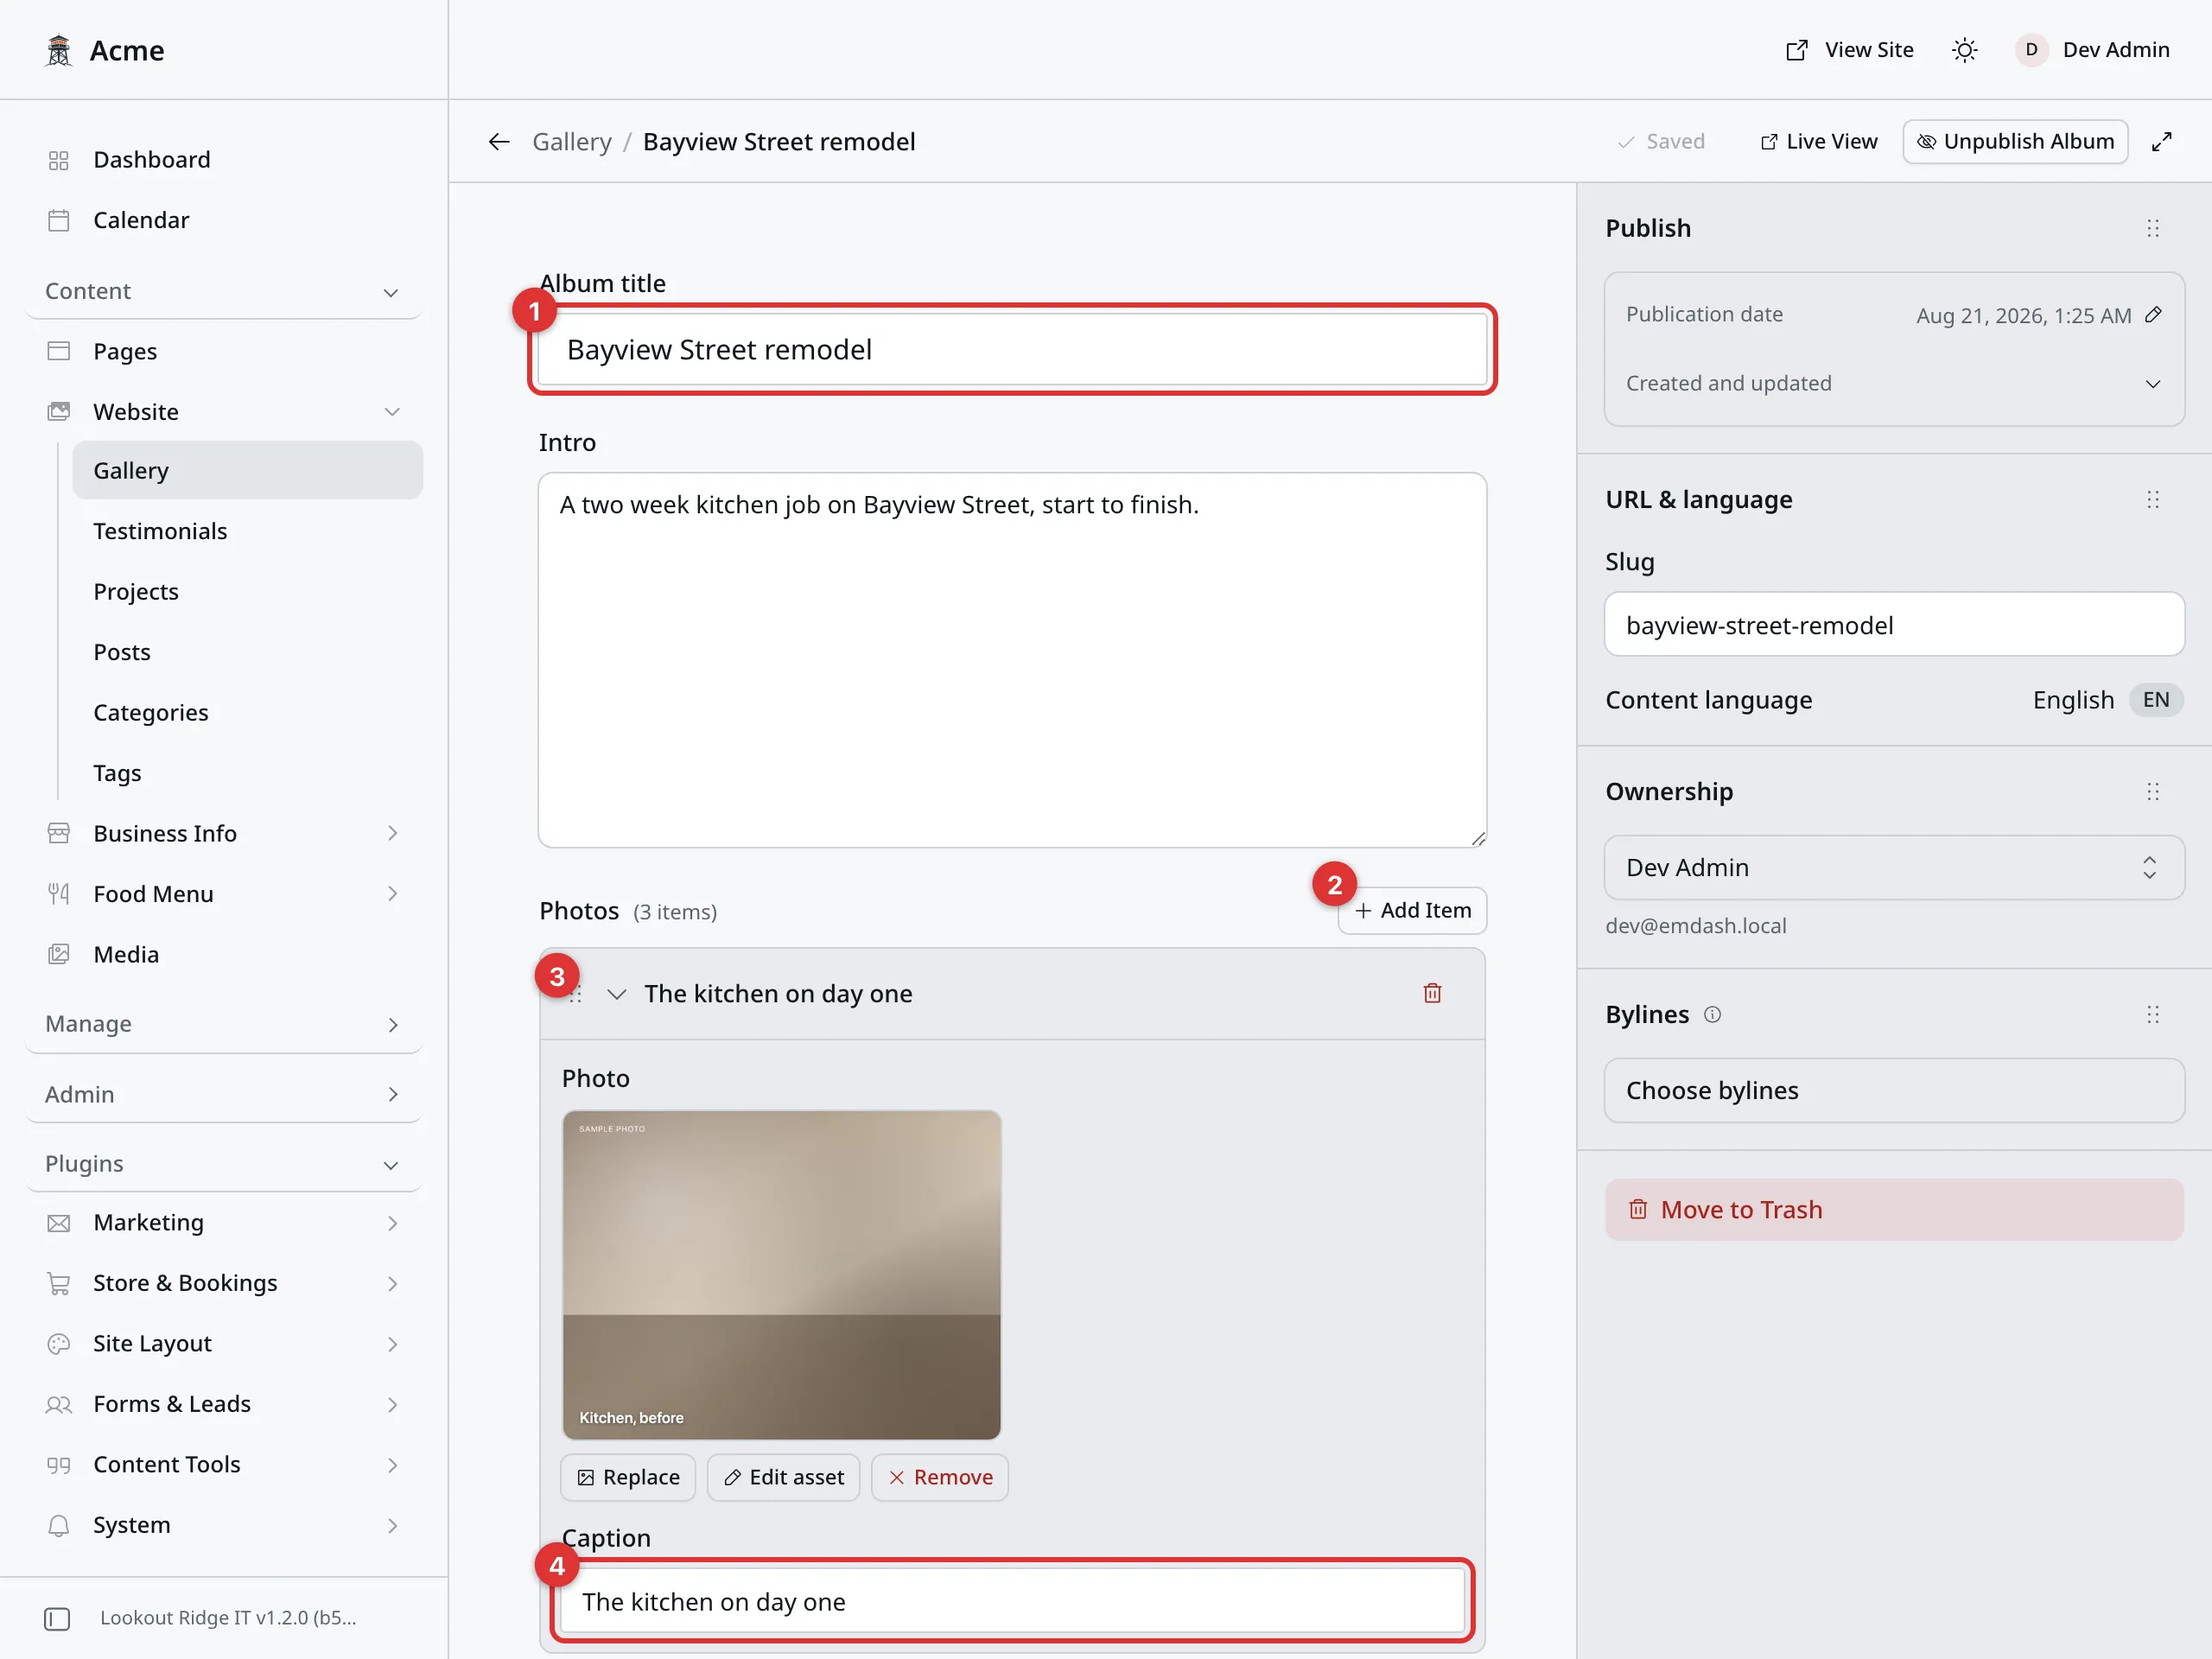
Each photo is one row, named after its caption.
1. Album title. The heading on your website.
2. Add Item. Adds an empty row for one photo. Click it once per photo.
3. The six dots. Drag these to move a photo up or down.
4. Caption. A short line under that photo.
For each photo:
- Click Add Item.
- Click Select image and pick the photo.
- Type a Caption, such as “The kitchen on day one”.
- Repeat for the next photo.
Then click Publish changes, then Publish changes again to confirm. The photos are on your website that second.
Captions are worth the two minutes. They tell a customer what they are looking at, and they are read out to anyone who cannot see the photo, unless the file has its own alt text. Media covers alt text.
Changing an album
Open the album and change what you need. The row for each photo is named after its caption, so you can find the right one without opening them all.
- To swap a photo, click Change under it and pick another.
- To reorder photos, drag the six dots on the left of a row.
- To remove a photo, click the red trash icon on the right of its row. This takes the photo out of the album only. The file stays in your Media Library.
When you are done, click Publish changes, then Publish changes again to confirm. Until you do, visitors keep seeing the old version.
Where albums show up
Your website has one Gallery page, and every album you publish appears on it, one under the other. There is no separate web address for a single album.
Albums can also show inside another page, through a Gallery block. Someone looking at your Services page then sees a strip of photos without going anywhere.
A Gallery block can show every album, or just one:
- Open the page under Content, then Pages.
- Click the Gallery block, then the pencil icon.
- Leave Album slug empty to show every album.
- Or type one album’s slug to show only that album.
An album’s slug is in the Settings panel on the right when you have the
album open. It
is the title in lower case with dashes, such as bayview-street-remodel.
Your town pages work the same way. Open one under Content, then Business Info, then Service Area Pages, add a Gallery block in the Body, and set Album slug to that town’s album. The page then shows local work to local customers.
Pages explains blocks in full.
The order albums appear in
Albums are listed on your site in alphabetical order by title.
To take charge of the order, use the Sort order box at the bottom of an album. The lowest number goes first, and an empty box counts as zero. Two albums with the same number fall back to alphabetical order.
Give every album a number, or none of them. Numbering only some is what makes this confusing.
Albums you did not make
Every folder under Media Folders has an album here with the same name. If an album turns up that you do not remember making, someone made a folder. Media Folders explains it.
Removing an album
Warning
Move to Trash on an album takes it off your website right away, with all of its photos.
The photos themselves are safe. They stay in your Media Library, and any other page using them is untouched. It is only this grouping that goes.
The button is at the bottom of the Settings panel on the right. You can get the album back from the Trash tab. Saving and publishing explains how.
If you only want the album gone for a while, use Unpublish Album at the top instead. Nothing is deleted, and publishing brings it back exactly as it was.
Last updated Oct 20, 2026