

Admin
Users
Who can sign in and what they can do.
This is the list of people who can sign in to your admin panel. Nobody else can get in, and no visitor to your website ever sees this screen.
Come here to bring a new member of staff in, or to shut an old one out.
Go to Admin, then Users.
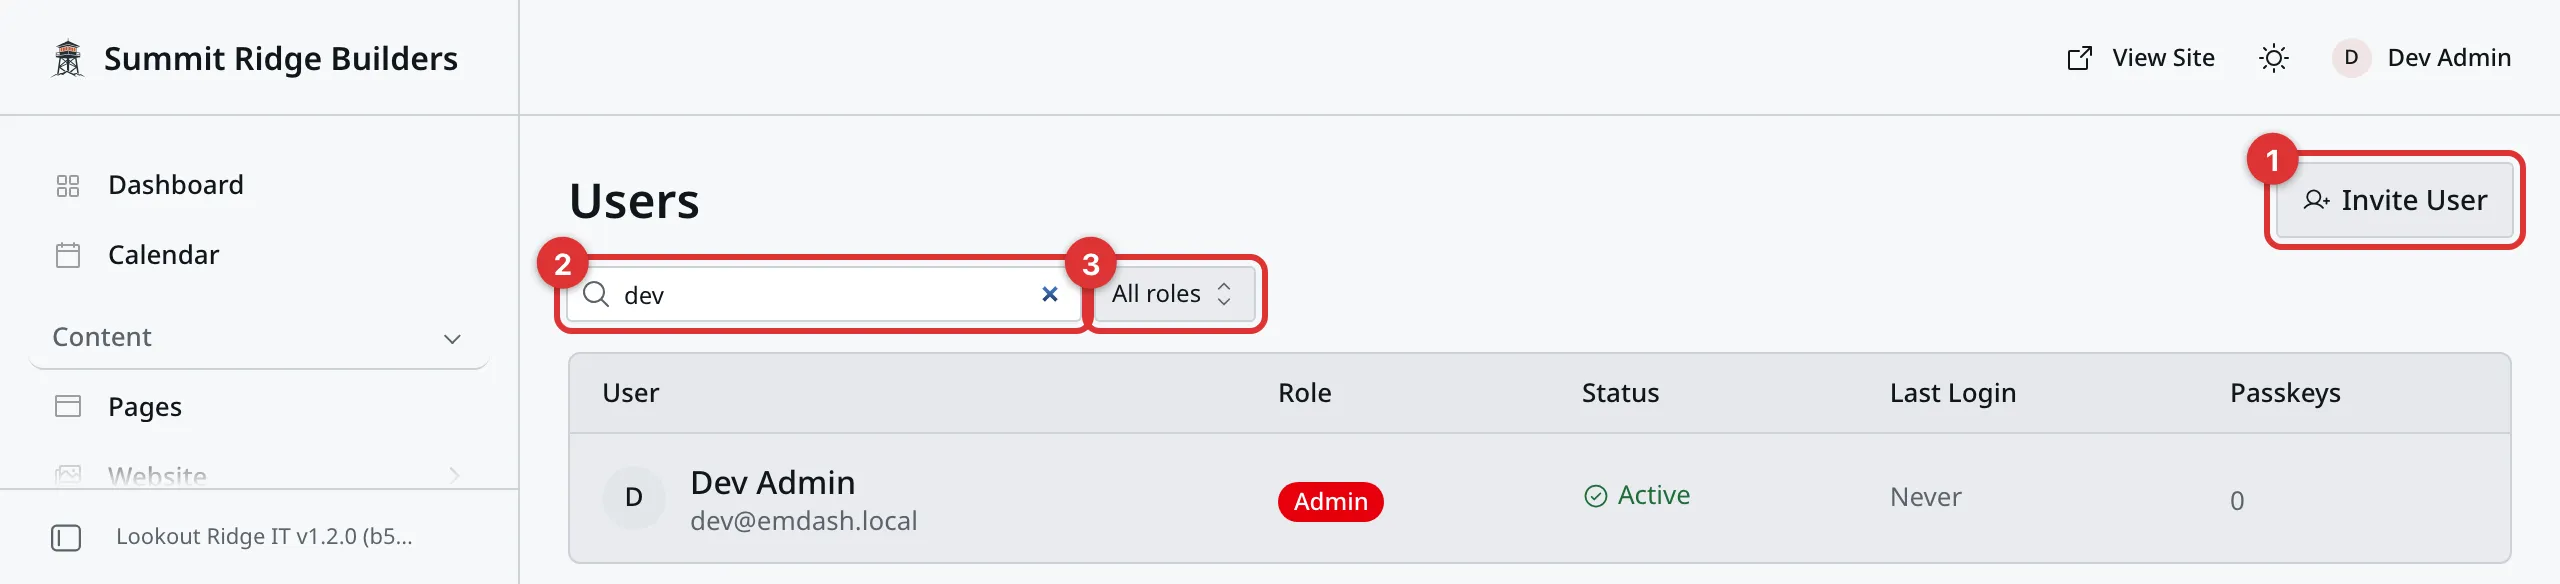
One row is one person. A search for dev cut this list down to one row.
1. Invite User. Brings somebody new in. There is a whole section on it below.
2. The search box. Type a name or an email address to find one person in a long list.
3. All roles. Shows only the people with the role you pick.
The table itself has five columns.
User is their name and the email address they sign in with.
Role is what they are allowed to do. The next section explains each one.
Status is Active or Disabled. Active means they can sign in today.
Last Login is when they were last in, or Never for somebody who has not been in yet.
Passkeys counts the devices they have set up. A passkey is a phone or a laptop standing in for a password. Signing in explains them.
The five roles
The panel names five, and it says in its own words what each one can do.
| Role | What the panel says |
|---|---|
| Subscriber | Can view content |
| Contributor | Can create content |
| Author | Can publish own content |
| Editor | Can manage all content |
| Admin | Full access |
Read them from the bottom up. Admin can do everything, this screen included, so an Admin can lock you out. Editor can work on all of your content but cannot touch settings or people. Author can write and publish their own entries only.
Contributor can write but not publish, so their work waits for somebody else. Subscriber can only look.
Important
For most trade businesses, two roles are enough.
Give an office manager Editor. They can update prices, photos and text on every page, and they cannot switch a feature off by mistake.
Keep Admin for yourself, and for us.
Inviting somebody
Click Invite User at the top right.
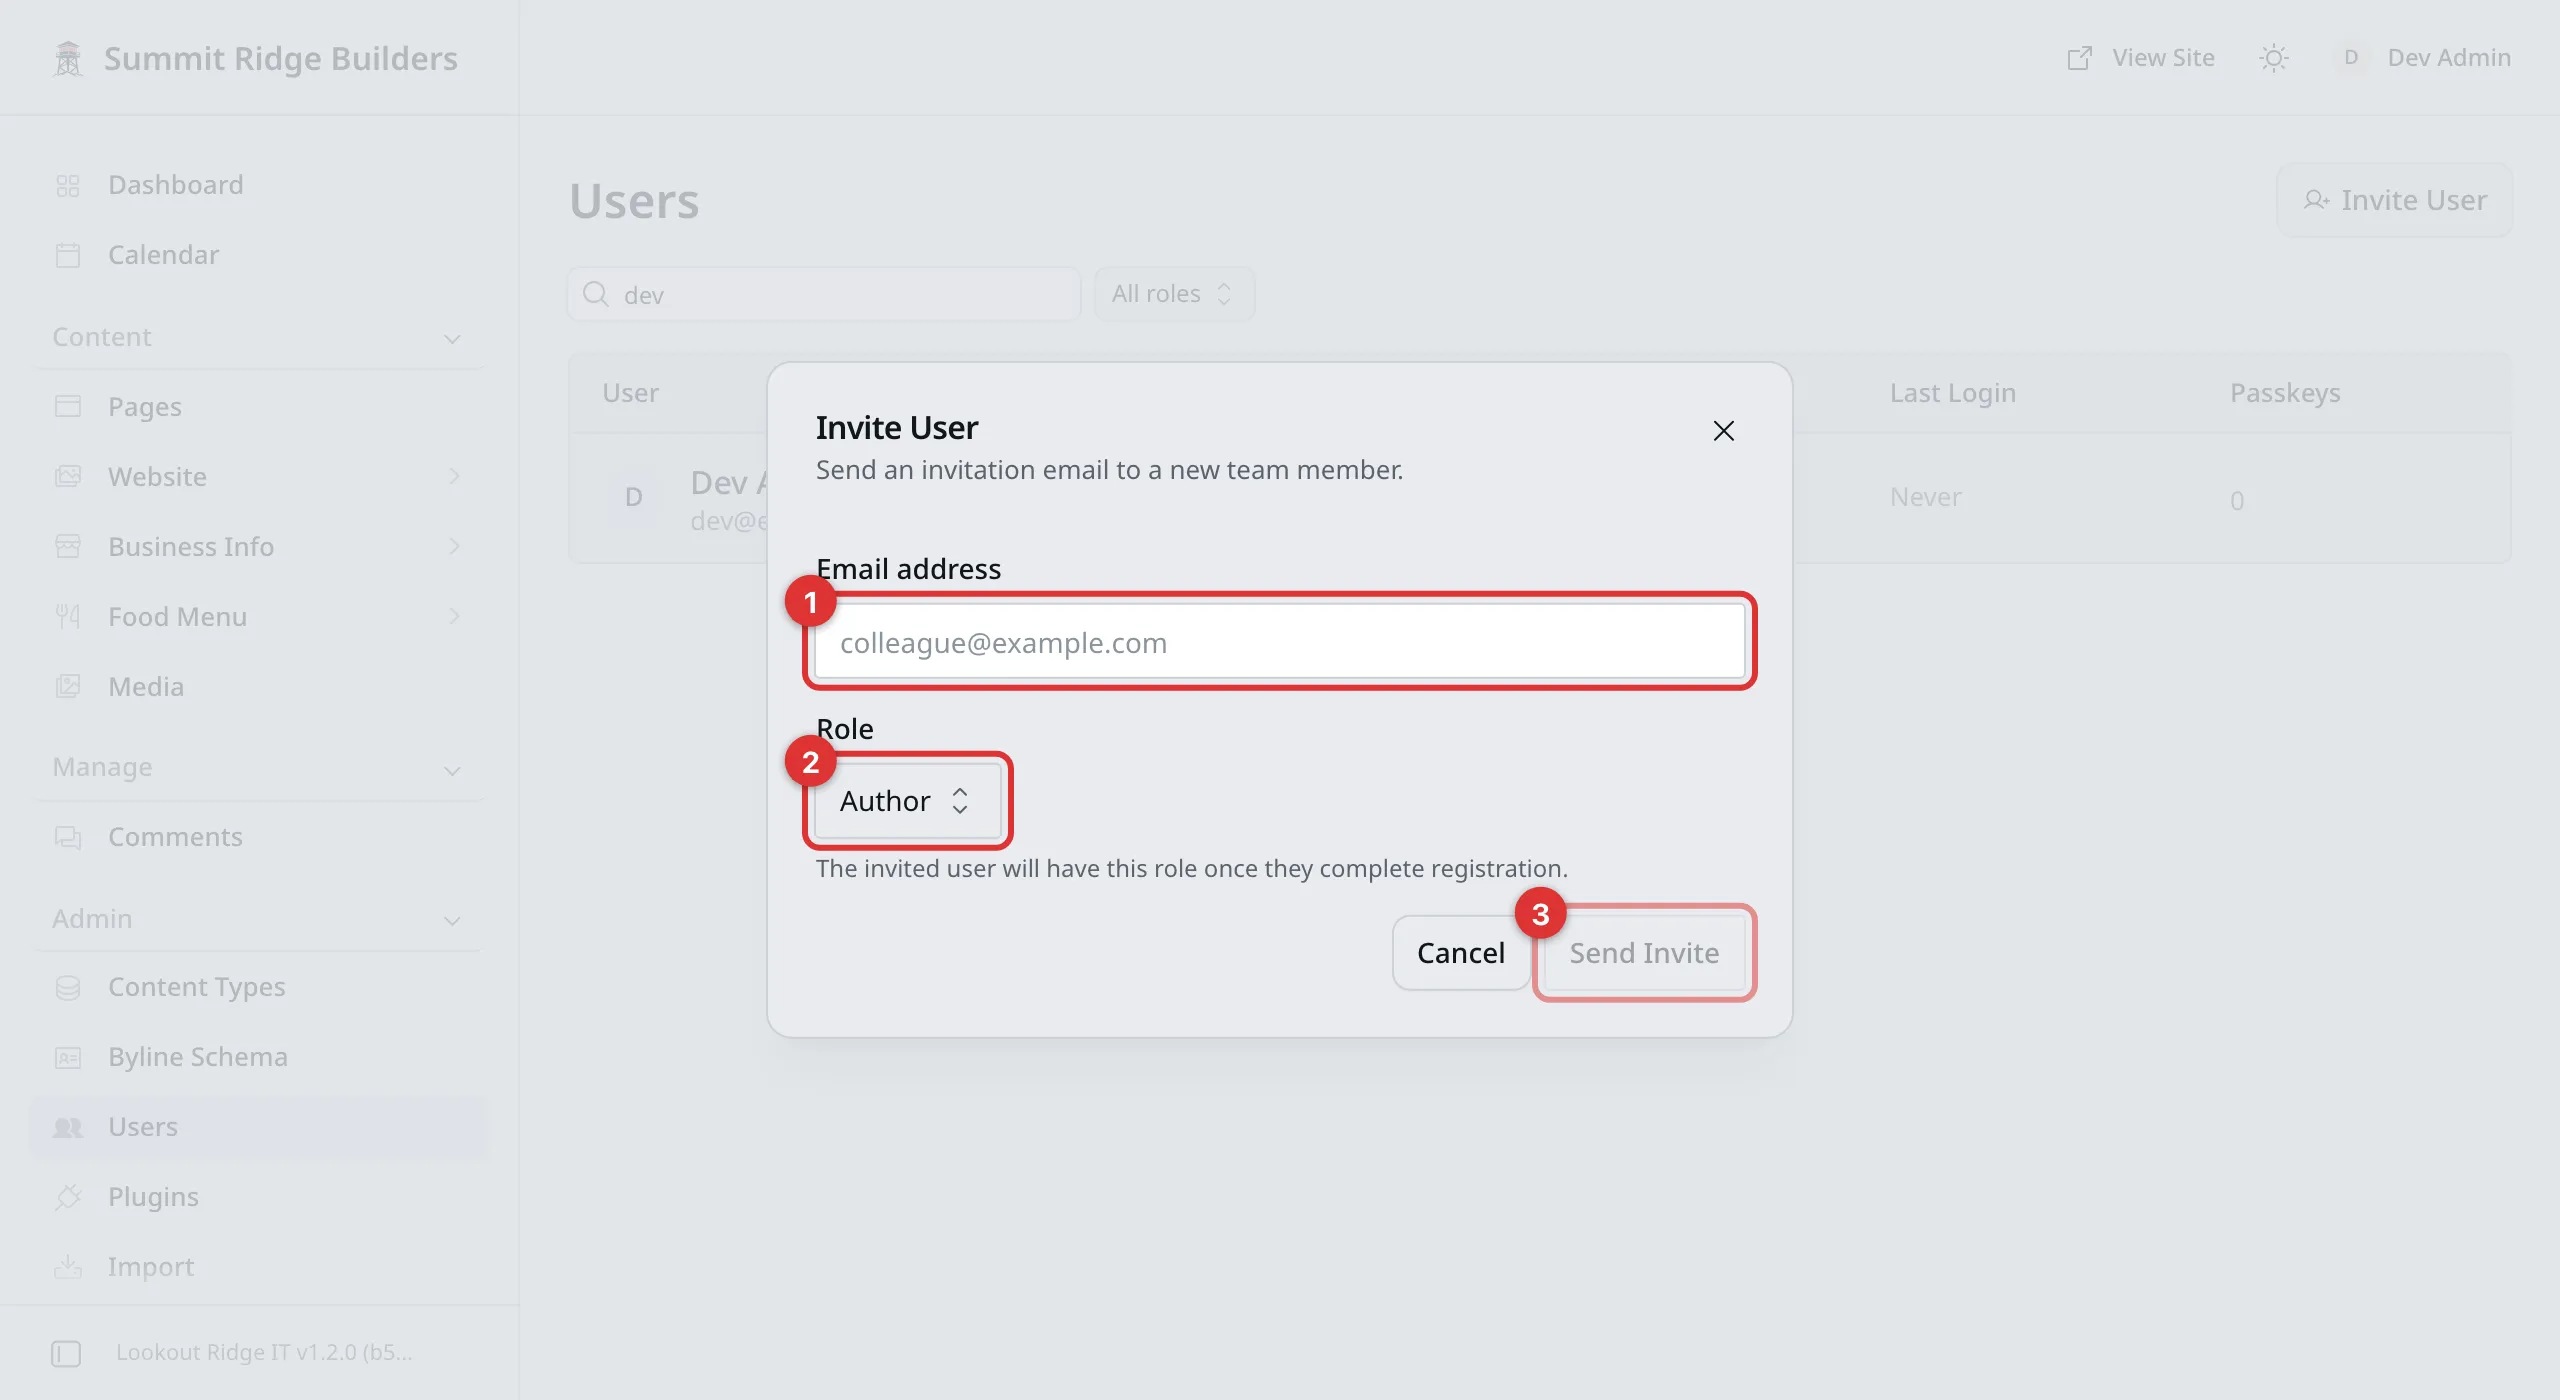
Two boxes, then send. The box says it sends an invitation email.
1. Email address. The address they will sign in with. Use their real work address. They cannot use a different one later.
2. Role. It starts on Author. Click the box and pick the role you want them to have. See the table above.
3. Send Invite. Sends them an email.
Warning
Check the email address before you click Send Invite.
The email carries a link that creates an account on your website. Anyone who opens that inbox can use it. One wrong letter and the invitation goes to a stranger.
Read it back to yourself once. Then send.
What happens next
They get an email saying they have been invited to your website. It holds one link.
They click it, and their browser walks them through setting up a passkey. When they are done they are signed in, with the role you picked.
The link lasts seven days and works once. After that it is dead, and you invite them again.
Nothing appears in your list until they finish. That is normal.
Important
Tell them the email is coming, and tell them to check their junk folder. An invitation that looks like spam gets deleted like spam.
Opening somebody’s account
Click their row. A panel slides in from the right.
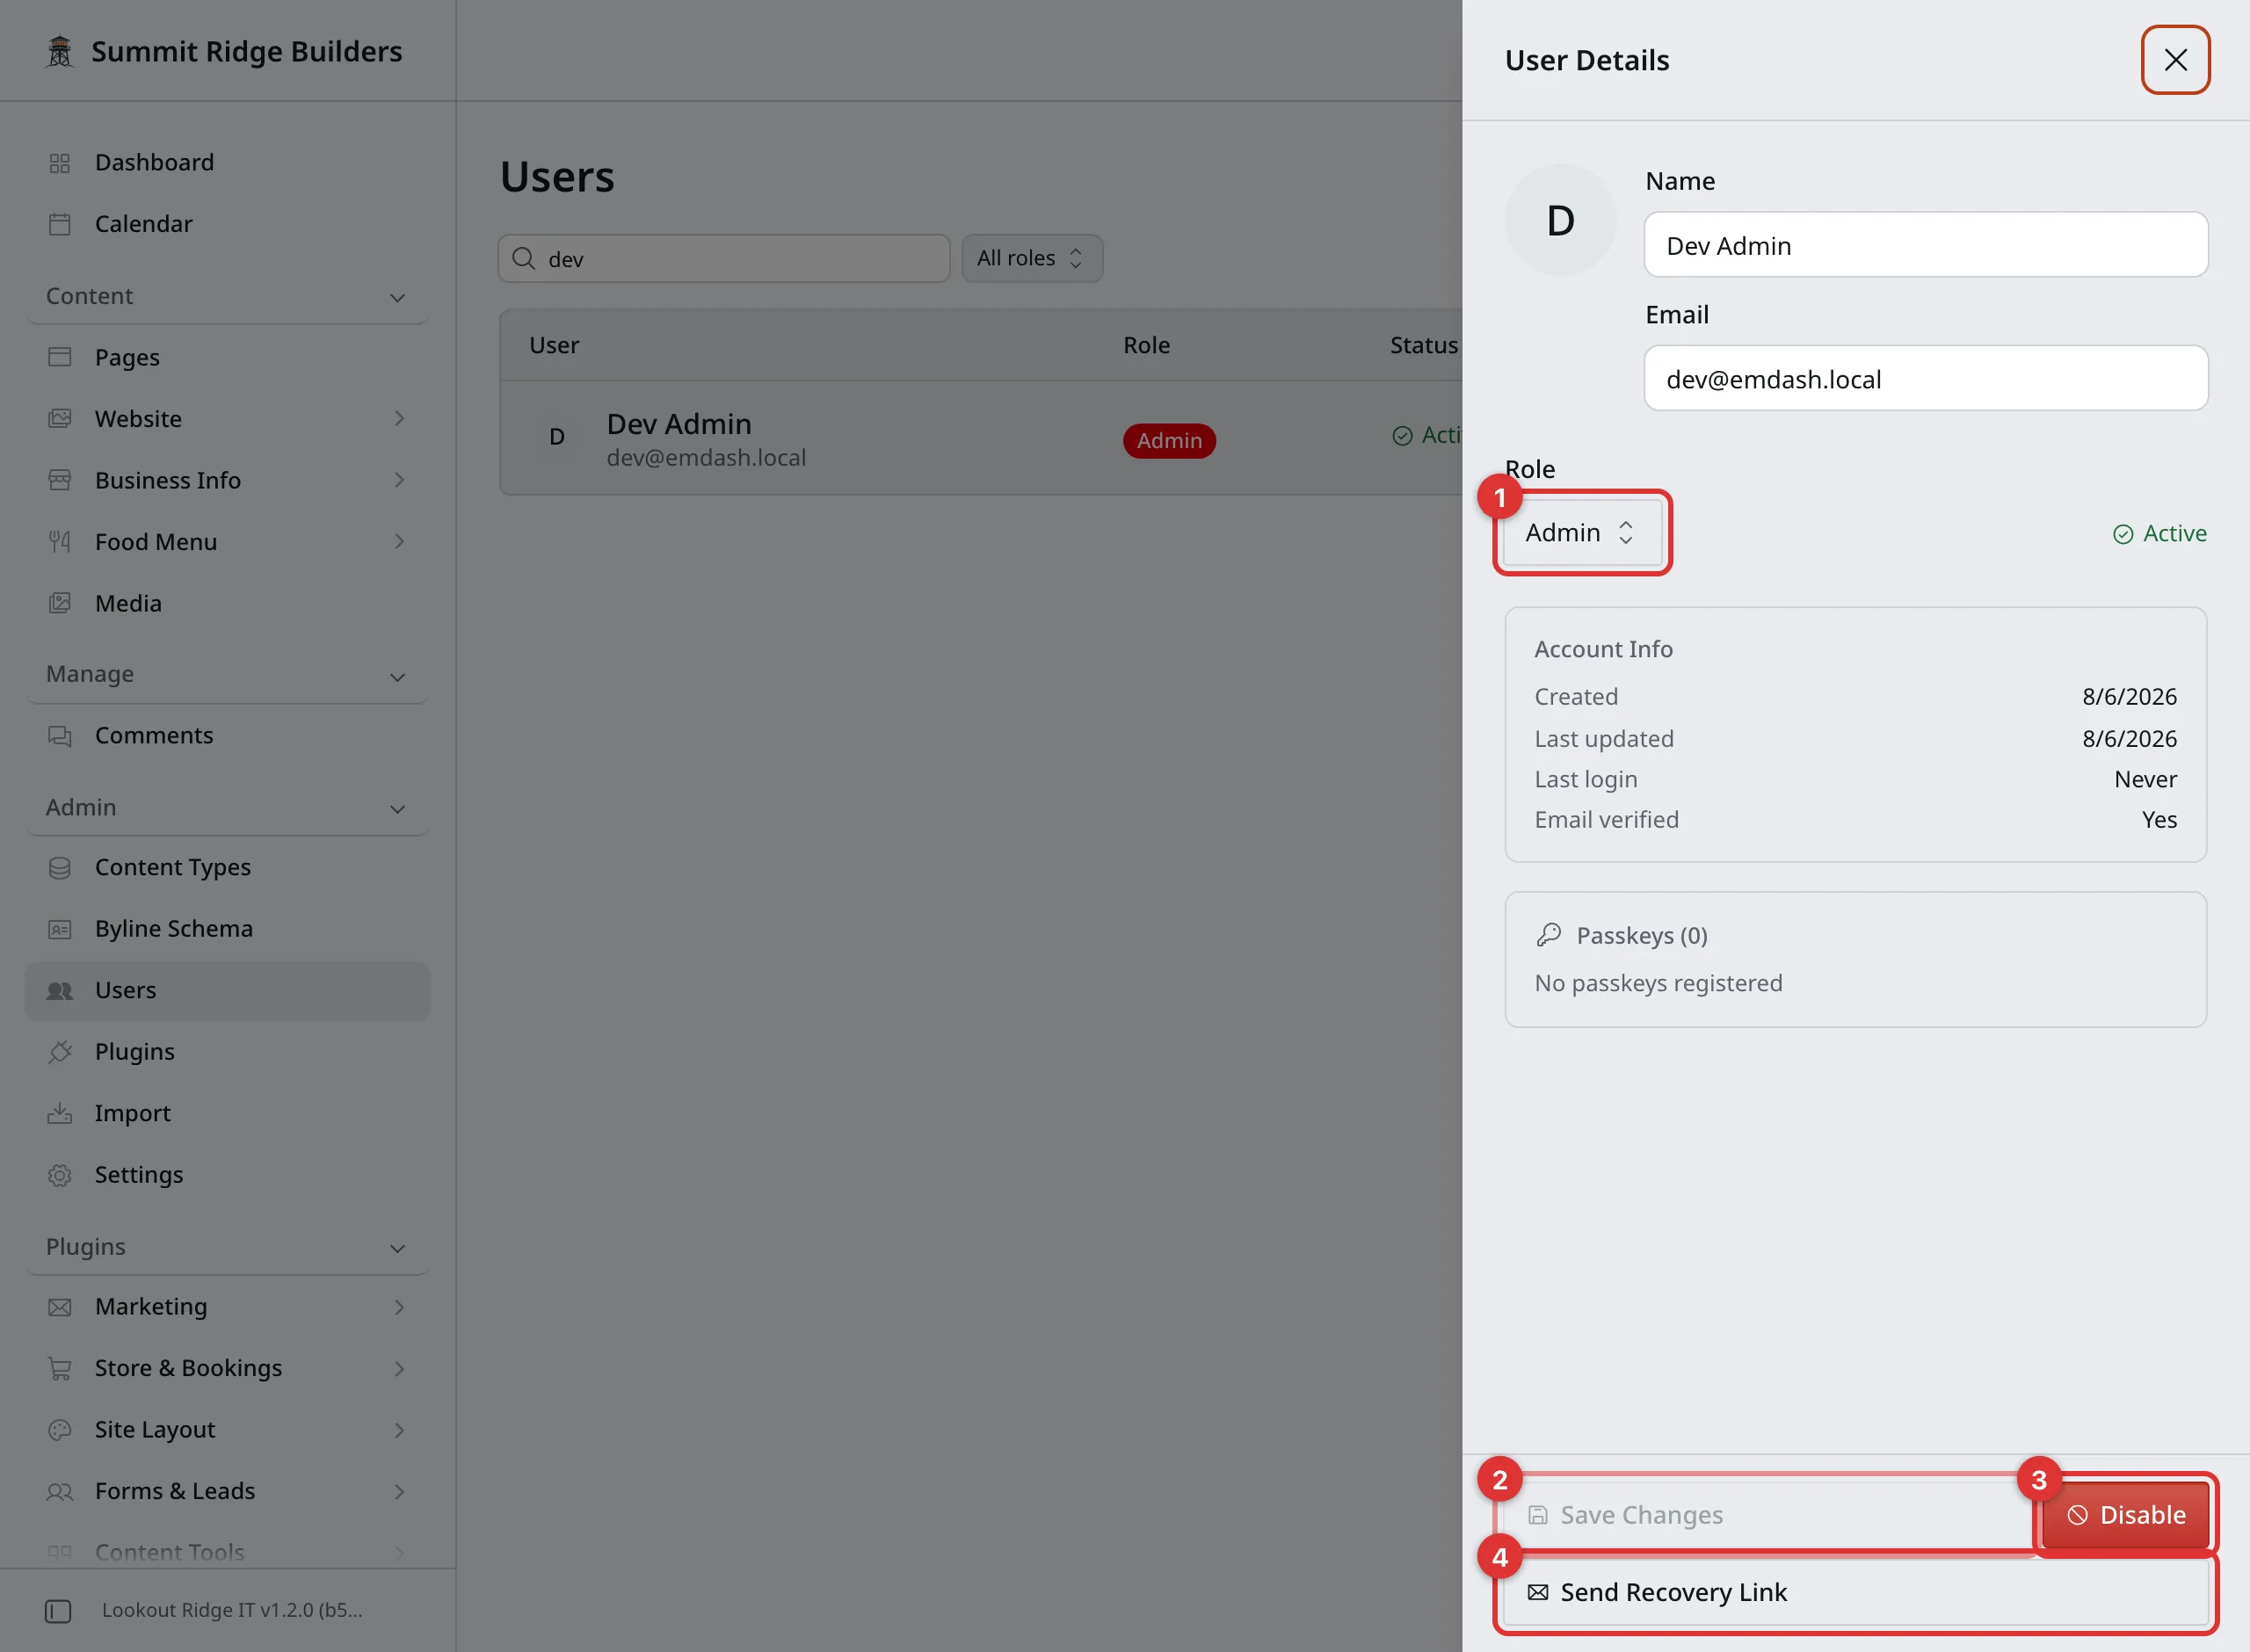
Everything about one person, in one panel.
1. Role. Click it to pick a different one.
2. Save Changes. Grayed out until you change something. Click it to save.
3. Disable. Shuts the account. Covered below.
4. Send Recovery Link. Emails them a link to sign in with. Use it when somebody has lost the device their passkey lives on.
Account Info, in the middle, is a record: when the account was made, when it last changed, when they last signed in. Under it, Passkeys lists the devices they have set up.
Name and Email at the top can be edited. Fixing a typo in a name is safe. Changing the email address changes how they sign in, so agree it with them first.
Changing what somebody can do
Warning
Think before you take Admin off somebody.
Only an Admin can invite people, change roles, and get you back in. Always keep at least one other Admin you trust and can reach by phone.
Two things the panel will not let you do at all: change your own role, and switch off your own account. It will not let the last Admin go either. Those are your safety net, so do not go looking for a way around them.
- Click their row.
- Click the Role box and pick the new role.
- Click Save Changes.
Moving somebody down a level asks you to confirm first. The box is headed Demote User? and names the old role and the new one. Click Demote User if that is what you meant.
The change takes effect the next time they use the panel.
Shutting an account
Use this when somebody leaves.
Warning
Disable locks that person out the moment you confirm. If they are in the middle of something, their work stops there.
Their content stays exactly where it is. Nothing they wrote is deleted.
- Click their row.
- Click Disable.
- The panel asks you to confirm and tells you they cannot sign in until the account is switched back on. Click Disable User.
Their Status changes to Disabled.
To let them back in, open the row again and click Enable. The button sits in the same place.
There is no way to delete a person from this screen, and that is on purpose. Disabling is enough: they cannot get in, and the record of who changed what stays honest.
When you cannot get in
Contact support
Contact us if you are locked out. Do not keep trying.
Tell us:
- your website address
- the email address on your account
- what the screen says, word for word
If another Admin is still able to sign in, they can open your row and click Send Recovery Link. That emails you a way back in, and it is the fastest fix there is.
Email support@lookoutridgeit.com. Getting support says what to put in the message.
Last updated Oct 20, 2026