

Content
Credentials
Licenses, certifications, and insurance you display.
Credentials is where your license numbers, your insurance and your trust badges live.
It lives on the SEO page, as one of four cards on the Business info tab:
- Go to Plugins, then Content Tools, then SEO.
- Click the Business info tab.
- Find the Credentials card. It is the last one.
Only Editors and Admins can open this tab. Each card saves on its own. Business Profile explains the checks at the top of a card, and how Save and Publish work there.
Where they show up
In your footer. Most styles show them in a small box near the bottom of every page, under the words you put in Heading. The Footer screen decides what your footer holds.
In a Credentials block. The same list can also show partway down a page, as a row of badges above a set of cards. Pages shows how a block is added.
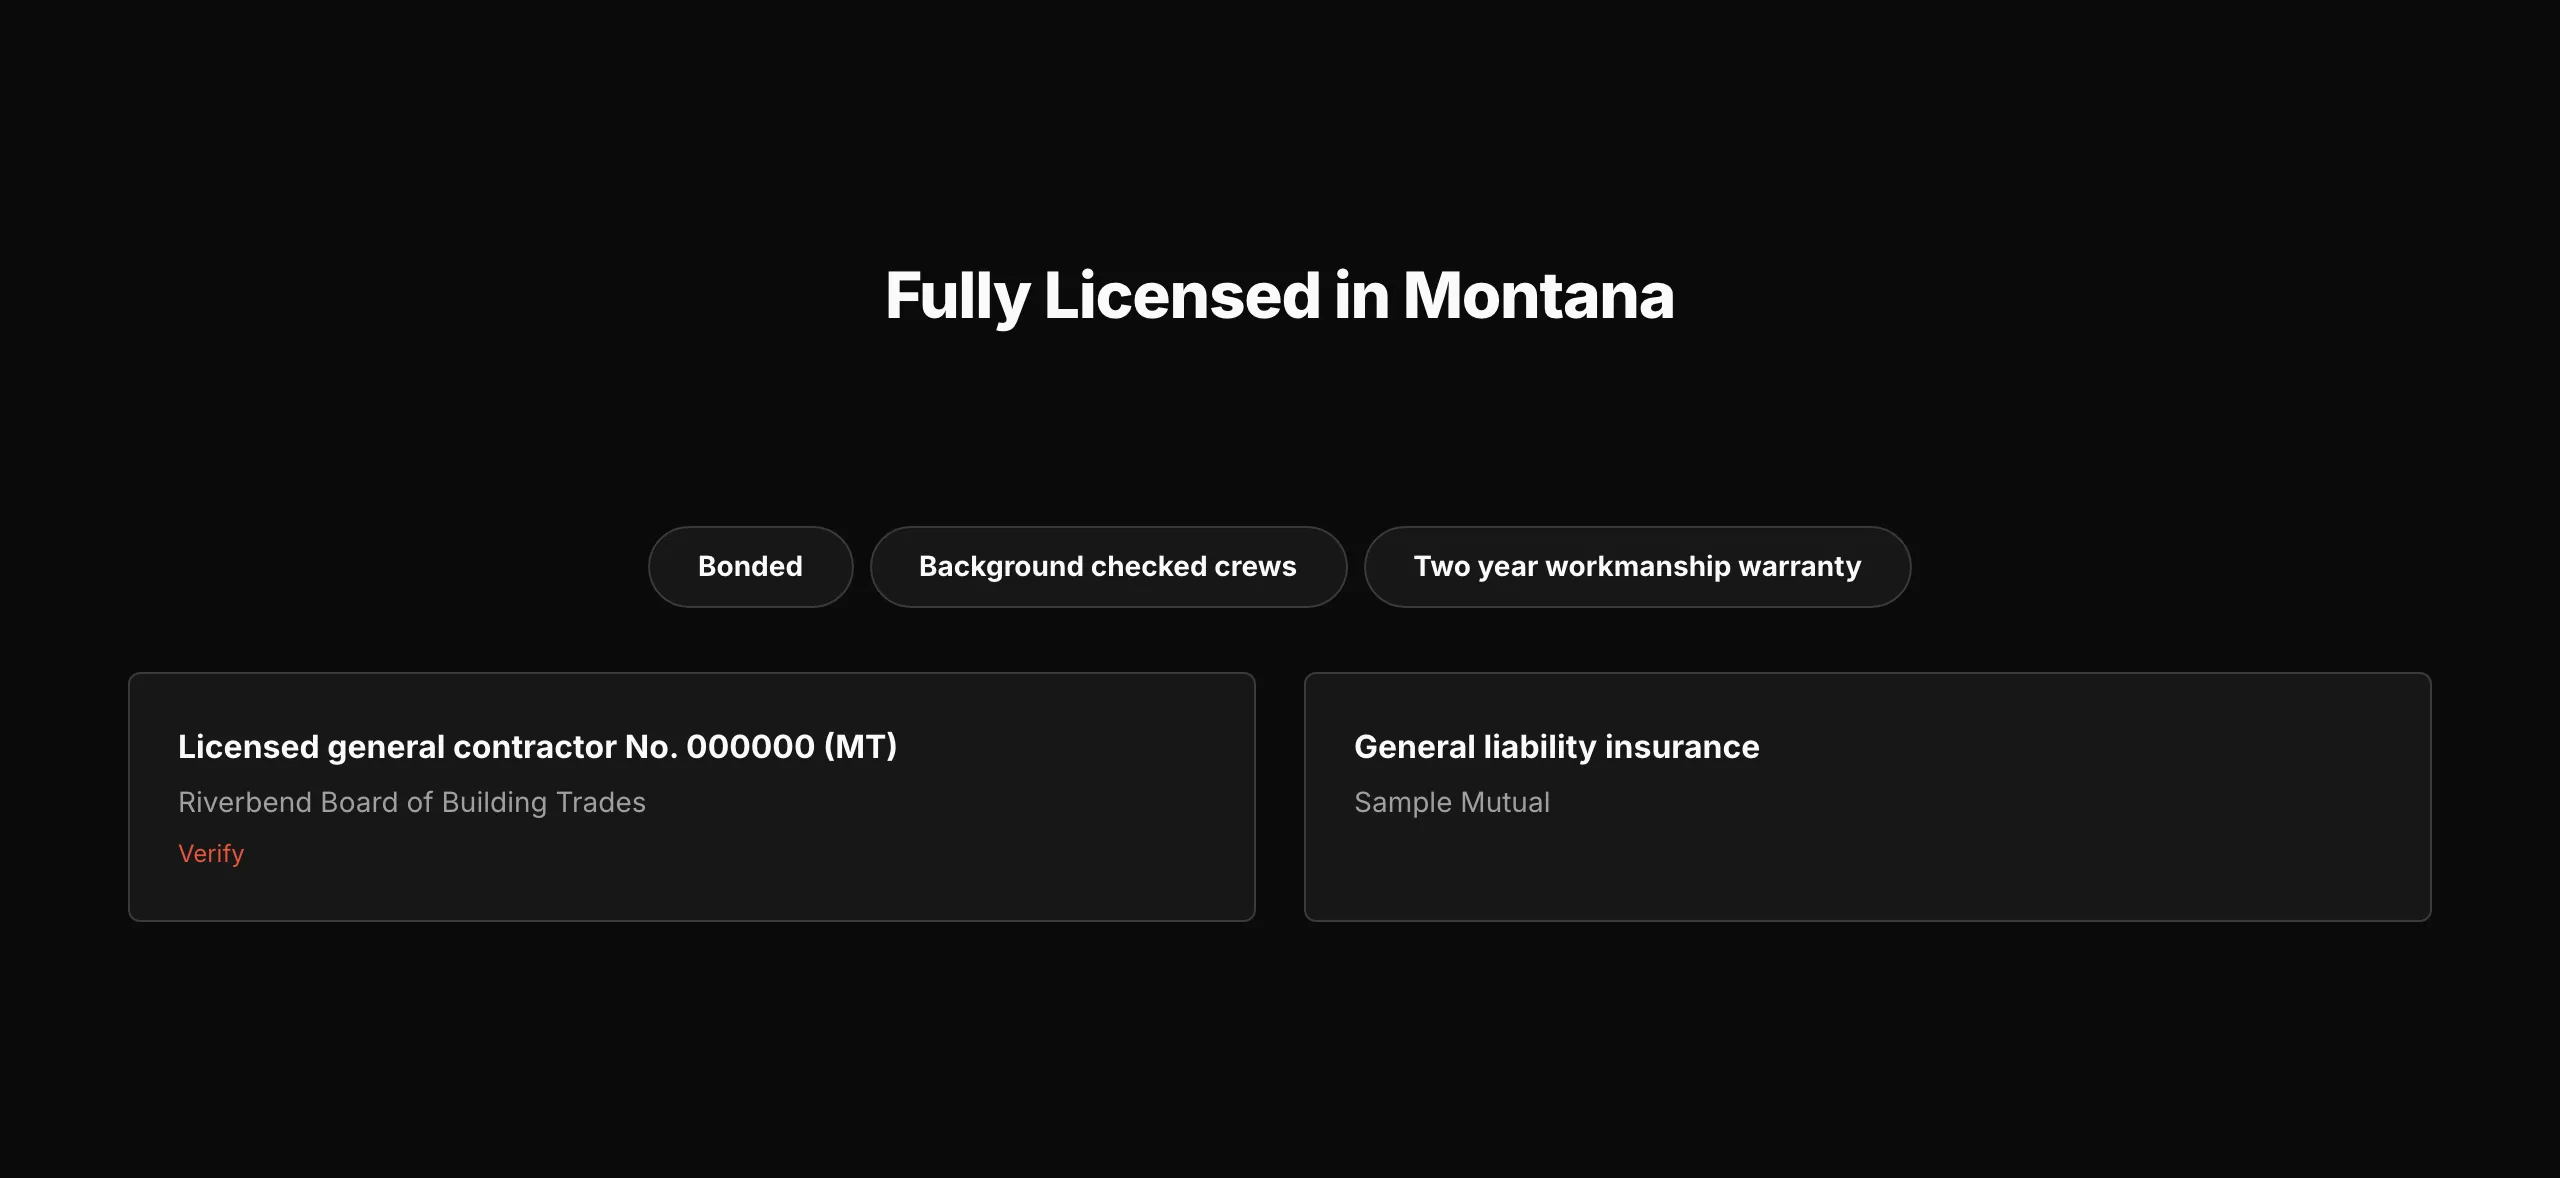
The block on a page. It reads the same card the footer does.
Both places read this one card. Change a number here and it changes in both. There is only ever one copy. Search engines read your licenses too.
The card holds two lists
Licenses & registrations is for a thing with a number: a trade license, a registration, a policy.
Trust badges is for a short claim with no number: “Bonded”, “Free estimates”.
Heading, at the top, is the words above both lists. Leave it empty and no heading shows.
Before you add anything
Warning
This list is a public claim about your business. Anyone can read it, and a customer may act on it.
Only list what you actually hold, with the number you actually have. Take a row out the day a license lapses.
Adding a license
- Click Add license. An empty row opens.
- Fill in the boxes below.
- Click Save at the bottom of the card. Your website changes right away.
License or registration. What it is called, such as “Licensed general contractor”. This is the only box you have to fill in.
Number. The number on the license. Your website prints it after the name, as “No. 000000”.
State / region. The short code, such as MT. Your website prints it in
brackets at the end of the line.
Issued by. Who granted it, such as a state board or an insurer. It prints under the name, but only in a block on a page. The footer leaves it out to save room.
Verification link. A web address where someone can look the license up. Fill it in and a small Verify link shows next to the row. Leave it empty and no link shows.
Put together, one row prints as: Licensed general contractor No. 000000 (MT).
Adding a trust badge
- Click Add badge. An empty row opens.
- Fill in the boxes below.
- Click Save at the bottom of the card.
Badge text. The words in the badge, such as “Bonded”. Keep it to a few words. This is the only box you have to fill in.
Logo. A small picture next to the words, for a scheme that gave you one. Click Choose image… and pick it. Replace swaps it, and Remove image takes it off. Media walks through the picker.
Link. A web address the badge points at. Fill it in and the whole badge becomes a link that opens in a new tab. Leave it empty and it is plain words.
Moving and removing rows
At the end of each row, ↑ and ↓ move it up or down. Remove takes it out.
Warning
Removing a row takes it off every page of your website as soon as you save. That is what you want for a lapsed license, and a surprise for anything else.
Checking your work
- Make your change and click Save at the bottom of the card.
- Open your live website and scroll to the bottom of any page.
- Read the line back. Check the number digit by digit.
Changed your mind before saving? Discard changes puts the card back the way it was.
Last updated Oct 20, 2026